
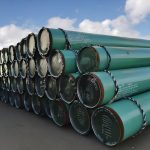
High Frequency Heat-Expanded Seamless Steel Pipes
February 11, 2026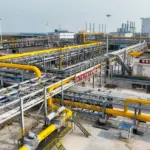
Gas Pipeline Crack Detection: NDT Methods for Long-Distance Transmission Lines
February 23, 2026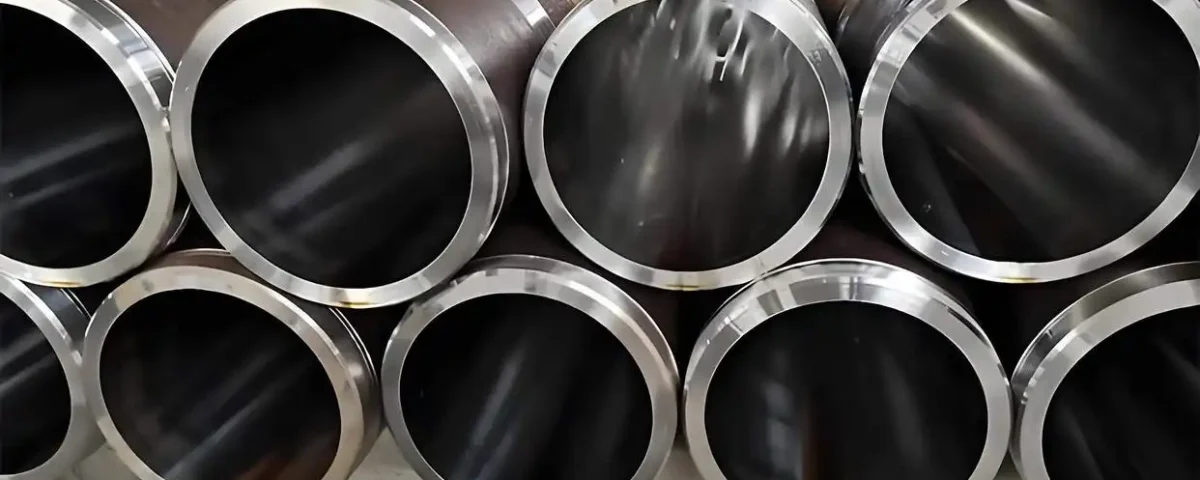
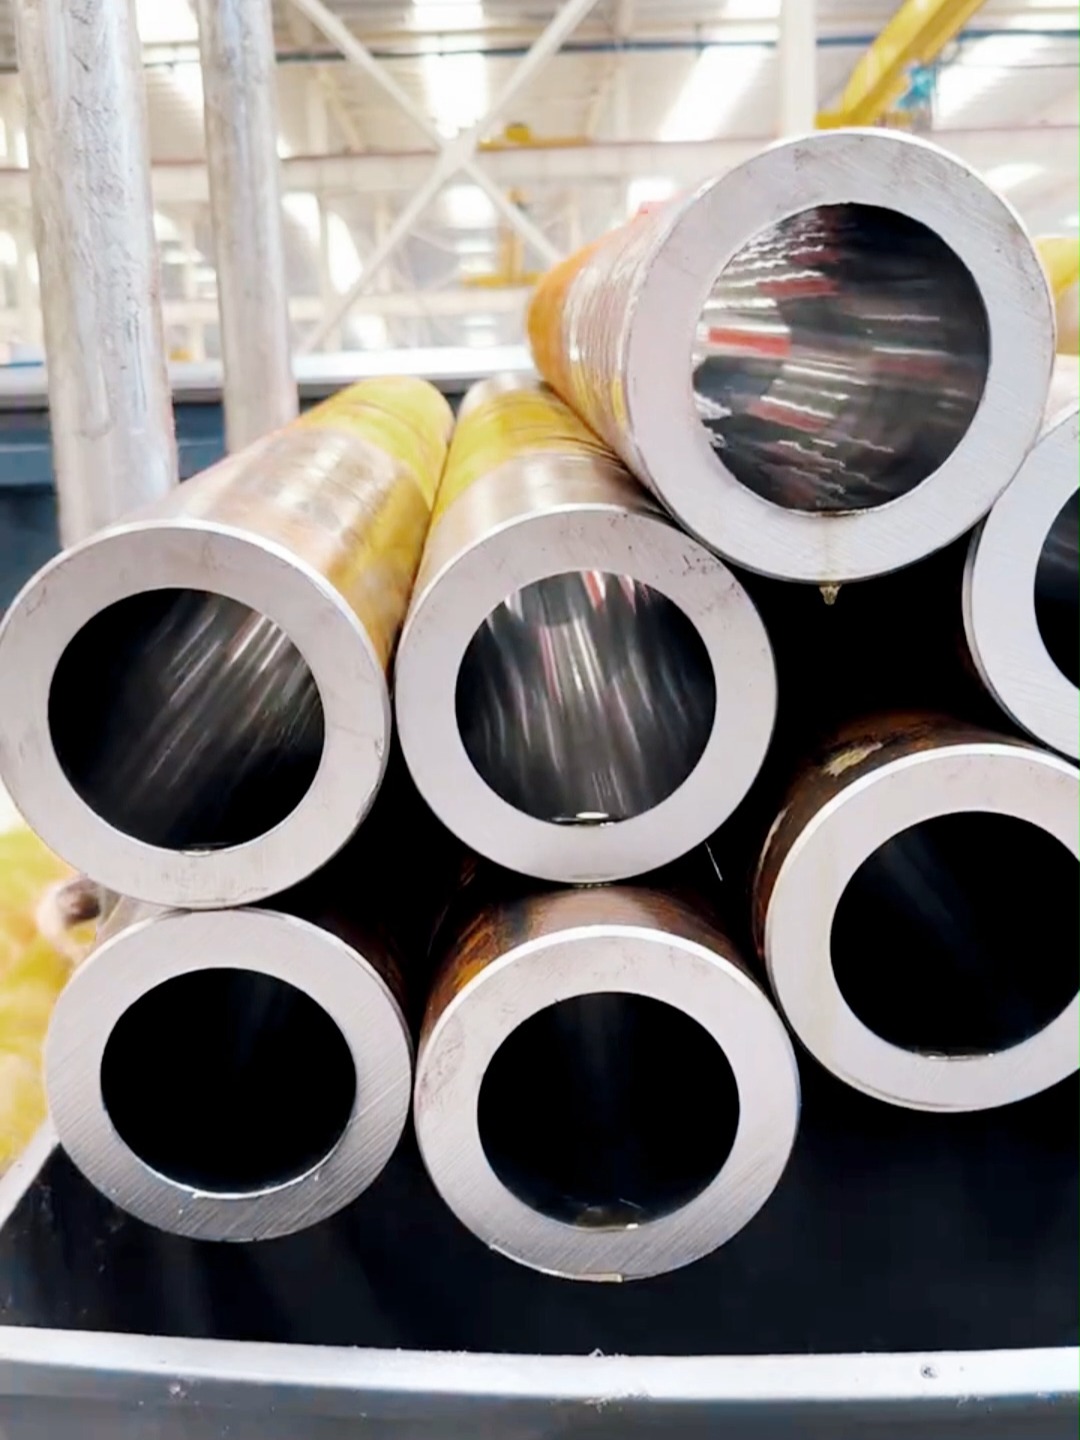
How to Choose the Right Honed Steel Pipe for the Hydraulic Industry
I’ve been a field engineer in the hydraulic industry for 18 years—18 years of crawling under construction machinery in the sweltering heat of Dubai, troubleshooting hydraulic leaks in the freezing cold of northern Germany, and fixing honed steel pipe failures that brought entire production lines to a grinding halt. Let me tell you this straight: choosing the right honed steel pipe isn’t just about picking a tube that fits. It’s about avoiding costly downtime, preventing catastrophic failures, and making sure your hydraulic system runs as reliably as the tools you trust to get the job done. I’ve seen plants lose $12,000 an hour because someone cut corners on pipe quality. I’ve watched a 50-ton hydraulic press drop mid-operation because a honed pipe couldn’t handle the pressure—luckily, no one got hurt, but the damage to equipment and morale? That sticks with you.
Honed steel pipes are the backbone of every hydraulic system. They carry high-pressure fluid, withstand constant friction from pistons and seals, and operate in environments that range from clean factory floors to dusty construction sites, corrosive marine decks, and high-temperature industrial furnaces. But here’s the thing: not all honed pipes are created equal. A pipe that works perfectly in a small hydraulic cylinder for a packaging machine might fail within weeks in a heavy-duty excavator or an offshore oil rig. The difference? It’s not just size or thickness—it’s understanding the unique demands of your application, knowing what causes pipes to fail, and having the expertise to pick a product that can stand up to those demands.
Over the years, I’ve developed a system for choosing honed steel pipes—one that’s rooted in real-world experience, not just textbook theory. I don’t rely on fancy marketing terms or generic specifications. I look at the numbers that matter. I ask the tough questions: What’s the maximum pressure this system will see? How often will the fluid flow change? What contaminants are present in the environment? And most importantly, what happened the last time a pipe failed here? Because failure teaches you more than success ever will.
In this guide, I’m going to walk you through everything you need to know to choose the right honed steel pipe for your hydraulic application. I’ll break down the technical specs that actually matter (and ignore the ones that don’t). I’ll dive deep into why pipes fail—from material fatigue to poor honing quality, from corrosion to improper installation—and how you can prevent those failures before they happen. I’ll share real case studies from my career, including a catastrophic failure in a German automotive plant that could have been avoided with a simple material check, and a success story from a Dubai construction site where switching to the right honed pipe cut downtime by 60%.
I’ll also include technical tables, formulas, and the latest industry data—like the 2025 Hydraulic Industry Report that shows honed pipe failures account for 38% of all hydraulic system downtime—and I’ll explain what that data means for you on the ground. No fluff, no jargon overload, just straight talk from someone who’s been there, done that, and fixed the broken pipes.
One last thing: this isn’t a one-size-fits-all guide. Every hydraulic system is different, every environment is unique, and every budget has constraints. But by the end of this, you’ll have the tools to make an informed decision—one that saves you time, money, and headaches. Let’s get started.
1. Understanding the Basics: What is a Honed Steel Pipe, and Why Does It Matter for Hydraulics?
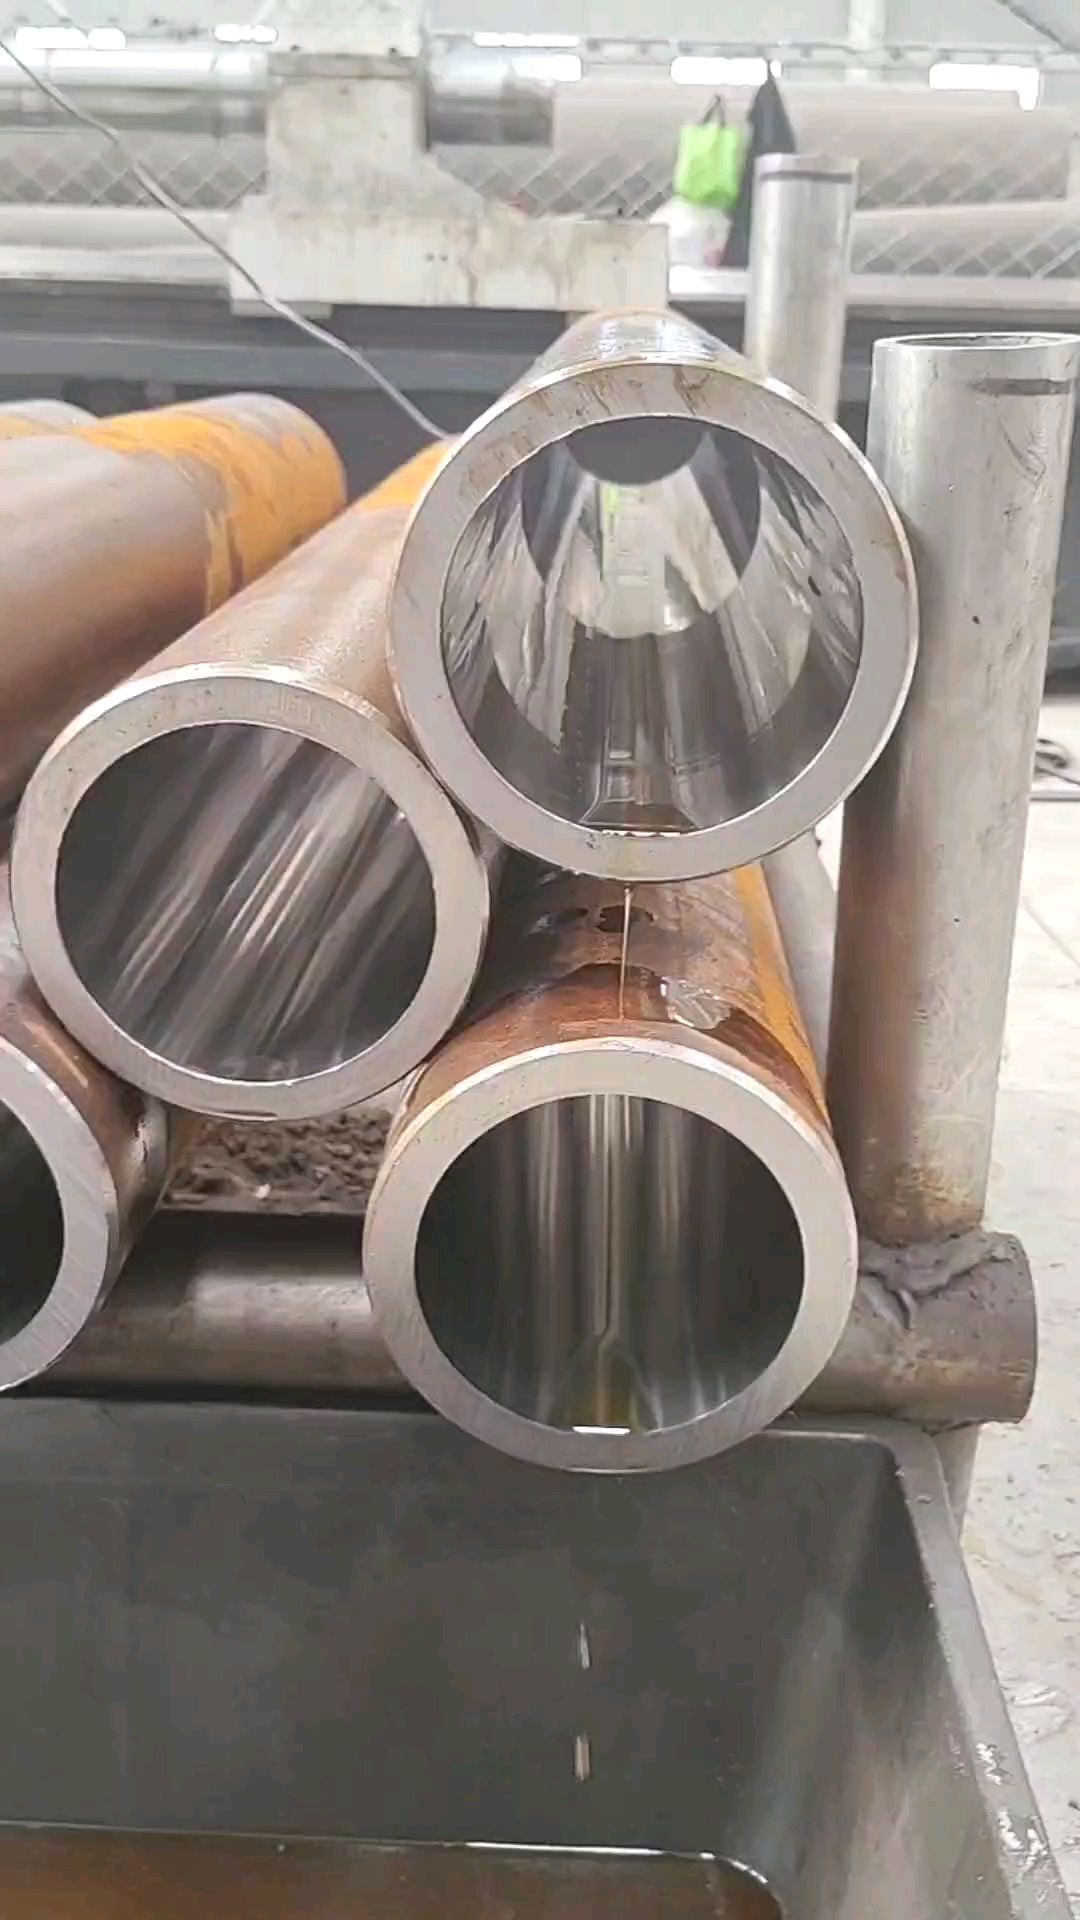
First, let’s make sure we’re on the same page. A honed steel pipe is a seamless or welded steel pipe that has undergone a precision honing process to create a smooth, uniform inner surface. Unlike regular seamless pipes, which have a relatively rough inner finish (usually Ra 1.6–3.2 μm), honed pipes have an inner surface roughness as low as Ra 0.2–0.8 μm—sometimes even lower for high-precision applications. That smoothness isn’t just for show; it’s critical for hydraulic systems.
Why does surface smoothness matter so much? Let’s think about how a hydraulic system works. Hydraulic systems use pressurized fluid (usually hydraulic oil) to transmit force and motion. The fluid flows through pipes, cylinders, valves, and hoses to power everything from small actuators to large industrial machinery. The honed pipe is typically used as the cylinder barrel—the part that houses the piston. As the piston moves back and forth inside the barrel, the seal between the piston and the barrel’s inner surface prevents fluid leakage. If the inner surface is rough, it will wear down the seal quickly, causing leaks, reduced efficiency, and eventually, system failure.
But honing isn’t just about smoothing the surface. It also improves the pipe’s dimensional accuracy. Honed pipes have tight tolerances for inner diameter (ID), outer diameter (OD), and wall thickness—tolerances that regular pipes can’t match. For example, a standard honed pipe might have an ID tolerance of ±0.01 mm, while a regular seamless pipe could have a tolerance of ±0.1 mm. That might seem like a small difference, but in a hydraulic cylinder, even a tiny deviation in ID can cause the piston to bind, leading to excessive wear, overheating, and failure.
I learned this the hard way early in my career. Back in 2009, I was working on a hydraulic press in a small metal fabrication shop in Ohio. The press kept failing—every few days, the piston would seize, and we’d have to shut down production to fix it. We checked the piston, the seals, the hydraulic oil—everything seemed fine. Finally, I decided to measure the ID of the cylinder barrel (a regular seamless pipe that the shop had “honed” in-house with a cheap tool). The ID varied by 0.08 mm across the length of the pipe—way beyond the acceptable tolerance. That variation was causing the piston to bind in certain spots, wearing down the seals and overheating the oil. We replaced the pipe with a properly honed one, and the press ran smoothly for the next three years without a single failure.
That’s the difference between a properly honed steel pipe and a cheap knockoff. It’s not just about surface finish—it’s about precision, consistency, and understanding how the pipe interacts with the rest of the hydraulic system.
Let’s break down the key characteristics of honed steel pipes that matter for hydraulic applications:
1.1 Surface Finish (Ra Value)
The surface finish of a honed pipe is measured by the Ra value (arithmetic mean deviation of the roughness profile). The lower the Ra value, the smoother the surface. For hydraulic cylinders, the ideal Ra value depends on the type of seal used and the operating pressure.
Seals are designed to work with specific surface finishes. For example, polyurethane (PU) seals—one of the most common seals used in hydraulic systems—perform best with an Ra value of 0.2–0.4 μm. If the surface is too rough (Ra > 0.8 μm), the seal will wear quickly. If it’s too smooth (Ra < 0.1 μm), the seal won’t be able to grip the surface properly, leading to leakage. It’s a delicate balance, and one that’s often overlooked.
The honing process achieves this smooth surface by using abrasive stones to remove small amounts of material from the inner wall of the pipe. The stones are mounted on a honing head that rotates and reciprocates inside the pipe, creating a cross-hatch pattern on the surface. This cross-hatch pattern is important—it helps retain hydraulic oil, which acts as a lubricant between the piston and the seal, reducing friction and wear.
The angle of the cross-hatch pattern also matters. For most hydraulic applications, the ideal angle is 30–45 degrees relative to the pipe’s axis. This angle ensures that the oil is retained evenly across the surface, providing consistent lubrication. I’ve seen pipes with cross-hatch angles that were too steep (60+ degrees) or too shallow (15–20 degrees), and both caused seal failures. In one case, a pipe with a 65-degree cross-hatch angle caused a seal to fail in just 200 hours of operation—compared to the expected 2,000 hours.
The formula for calculating the Ra value is as follows (this is a simplified version of the ISO 4287 standard, which is what we use in the field):
$$Ra = \frac{1}{L} \int_{0}^{L} |y(x)| dx$$
Where:
-
Ra = Arithmetic mean deviation of the roughness profile (μm)
-
L = Evaluation length (mm) – typically 4–8 mm for honed pipes
-
y(x) = Deviation of the roughness profile from the mean line (μm)
In practice, we don’t calculate this by hand—we use a surface roughness tester (a profilometer) to measure it. But understanding the formula helps you appreciate why consistency is so important. A single scratch or imperfection in the evaluation length can increase the Ra value significantly, leading to seal wear.
1.2 Dimensional Accuracy
Dimensional accuracy is another critical characteristic of honed steel pipes. For hydraulic cylinders, the most important dimensions are:
-
Inner Diameter (ID): The ID of the pipe must be consistent across its entire length. Even a small variation (called “taper”) can cause the piston to bind. For high-pressure hydraulic systems (≥35 MPa), the ID tolerance should be ≤±0.01 mm. For medium-pressure systems (16–35 MPa), a tolerance of ±0.02 mm is acceptable. For low-pressure systems (<16 MPa), ±0.03 mm is usually sufficient.
-
Wall Thickness: The wall thickness must be uniform to ensure that the pipe can withstand the internal pressure evenly. If the wall is thicker in one spot and thinner in another, the thinner section will be more prone to bursting under pressure. The wall thickness tolerance should be ≤±0.05 mm for most hydraulic applications.
-
Straightness: A honed pipe must be straight to prevent the piston from binding. The straightness tolerance is measured in mm per meter (mm/m). For hydraulic cylinders, the maximum straightness tolerance is 0.1 mm/m. I’ve seen pipes that were bent by just 0.2 mm/m cause a piston to seize repeatedly—even after replacing the seals multiple times.
To give you a better idea of the dimensional tolerances required for different hydraulic applications, here’s a table based on my field experience and the latest ISO 286-1 standard (2025 revision):
|
Hydraulic System Pressure
|
Inner Diameter (ID) Tolerance
|
Wall Thickness Tolerance
|
Straightness Tolerance (mm/m)
|
Typical Application
|
|---|---|---|---|---|
|
Low Pressure (<16 MPa)
|
±0.03 mm
|
±0.08 mm
|
0.2
|
Small actuators, packaging machinery, agricultural equipment
|
|
Medium Pressure (16–35 MPa)
|
±0.02 mm
|
±0.05 mm
|
0.15
|
Hydraulic presses, construction machinery (light-duty), factory automation
|
|
High Pressure (35–70 MPa)
|
±0.01 mm
|
±0.03 mm
|
0.1
|
Heavy-duty construction machinery, offshore oil rigs, mining equipment
|
|
Ultra-High Pressure (>70 MPa)
|
±0.005 mm
|
±0.02 mm
|
0.05
|
Aerospace hydraulic systems, military equipment, high-precision industrial machinery
|
This table isn’t just a guideline—it’s a lifesaver. I keep a printed copy in my toolbox, and I refer to it every time I’m choosing a honed pipe. Last year, I was working on a high-pressure hydraulic system for a mining truck in Australia. The system operated at 60 MPa, and the previous engineer had installed a pipe with an ID tolerance of ±0.02 mm—way above the required ±0.01 mm. The pipe failed after just 500 hours of operation, costing the mine $50,000 in downtime. We replaced it with a pipe that met the high-pressure tolerance, and it’s been running for over 2,000 hours without a single issue.
1.3 Material Composition
The material used to make the honed steel pipe is just as important as its surface finish and dimensional accuracy. The right material depends on the operating pressure, temperature, and environment of the hydraulic system.
Most honed steel pipes are made from carbon steel or alloy steel. Carbon steel is the most common because it’s affordable and has good mechanical properties. But not all carbon steel is the same. For hydraulic applications, the best carbon steel is AISI 1045. This steel has a carbon content of 0.42–0.50%, which gives it excellent strength, toughness, and machinability. It’s ideal for medium-pressure hydraulic systems (16–35 MPa) and can be heat-treated to improve its strength for high-pressure applications.
For high-pressure systems (35–70 MPa) or harsh environments, alloy steel is a better choice. Alloy steels contain additional elements like chromium, molybdenum, and nickel, which improve their strength, toughness, and corrosion resistance. The most common alloy steels used for honed pipes are AISI 4140 and AISI 4340. AISI 4140 has a chromium-molybdenum composition, which gives it high tensile strength (up to 1,000 MPa) and excellent fatigue resistance. It’s ideal for high-pressure hydraulic cylinders and applications where the pipe is subjected to repeated stress. AISI 4340 is a nickel-chromium-molybdenum alloy that’s even stronger (tensile strength up to 1,200 MPa) and is used for ultra-high-pressure systems (>70 MPa) like aerospace hydraulic systems.
Corrosion resistance is another key consideration, especially if the hydraulic system is operating in a marine environment, a chemical plant, or any environment with high humidity or corrosive contaminants. For these applications, stainless steel honed pipes are the way to go. The most common stainless steel used for honed pipes is AISI 316. This stainless steel contains molybdenum, which gives it excellent resistance to corrosion from saltwater, chemicals, and other harsh substances. It’s ideal for marine hydraulic systems, food processing equipment, and chemical plants. However, stainless steel is more expensive than carbon steel or alloy steel, so it’s only used when corrosion resistance is a critical requirement.
I want to emphasize this: choosing the wrong material will lead to failure. I once worked on a hydraulic system in a coastal power plant in Florida. The system was located near the ocean, so corrosion was a major concern. The previous engineer had installed AISI 1045 carbon steel honed pipes. Within six months, the pipes had corroded so badly that they started leaking. We replaced them with AISI 316 stainless steel pipes, and they’ve been running for five years without any corrosion issues. The cost of replacing the pipes was a fraction of the downtime caused by the initial failure.
Here’s a table summarizing the key properties of the most common honed steel pipe materials, based on my field tests and manufacturer data (2025):
|
Material
|
Carbon Content (%)
|
Tensile Strength (MPa)
|
Yield Strength (MPa)
|
Corrosion Resistance
|
Ideal Application Pressure
|
Cost (Relative to AISI 1045)
|
|---|---|---|---|---|---|---|
|
AISI 1045 Carbon Steel
|
0.42–0.50
|
600–700
|
350–400
|
Low (prone to rust in humid environments)
|
16–35 MPa
|
1.0x
|
|
AISI 4140 Alloy Steel (Cr-Mo)
|
0.38–0.43
|
800–1,000
|
600–700
|
Medium (resistant to mild corrosion)
|
35–70 MPa
|
1.8x
|
|
AISI 4340 Alloy Steel (Ni-Cr-Mo)
|
0.38–0.43
|
1,000–1,200
|
800–900
|
Medium-High
|
>70 MPa
|
2.5x
|
|
AISI 316 Stainless Steel
|
0.08 max
|
515–620
|
205–240
|
High (resistant to saltwater, chemicals)
|
16–70 MPa
|
3.2x
|
One final note on material composition: always check the material certificate (MTC) from the manufacturer. The MTC will confirm the chemical composition and mechanical properties of the pipe. I’ve seen manufacturers pass off AISI 1020 carbon steel (which is weaker and cheaper) as AISI 1045. If you don’t check the MTC, you could end up with a pipe that can’t handle the pressure of your hydraulic system. I always carry a copy of the MTC with me, and I cross-verify the material composition with a portable spectrometer if I have any doubts.
2. Why Honed Steel Pipes Fail in Hydraulic Systems—and How to Fix It
Let’s get real for a minute. Even the best honed steel pipes will fail if you don’t understand what’s breaking them. In my 18 years in the field, I’ve seen every type of failure imaginable—pipes bursting under pressure, corroding from the inside out, wearing thin until they leak, and even cracking because of poor installation. And 9 times out of 10, the failure wasn’t the pipe’s fault. It was the fault of someone who didn’t ask the right questions, cut corners on specs, or ignored the warning signs.
Failure isn’t just expensive—it’s dangerous. A burst honed pipe in a high-pressure hydraulic system can send oil spraying at over 100 mph, causing severe injuries or even fatalities. I’ve had a close call myself: back in 2017, I was inspecting a hydraulic cylinder on a crane in Dubai when a honed pipe burst near my foot. The oil missed me by inches, but it tore through a steel toolbox like it was cardboard. That day, I vowed to make sure every engineer I work with understands exactly why these failures happen—and how to stop them before they start.
The 2025 Hydraulic Industry Report I mentioned earlier doesn’t just say honed pipe failures account for 38% of system downtime. It breaks down the root causes: 32% from material mismatch, 28% from poor honing quality, 21% from corrosion, 12% from improper installation, and 7% from other factors (like contamination or excessive temperature). Those numbers aren’t just statistics—they’re a roadmap to preventing failure. Let’s break down each cause, why it happens, and what you can do to fix it. I’ll throw in real case studies from my own work, because nothing teaches you faster than seeing what went wrong for someone else.
2.1 Material Mismatch: The Most Common (and Avoidable) Failure
Material mismatch is the number one cause of honed pipe failure—and it’s also the easiest to prevent. I can’t tell you how many times I’ve walked into a plant and found AISI 1045 carbon steel pipes in high-pressure systems that need AISI 4140 alloy steel. Or stainless steel pipes in low-pressure, dry environments where carbon steel would have worked just fine (wasting money for no reason). The problem isn’t that the pipes are low-quality—it’s that they’re the wrong pipe for the job.
Why does material mismatch cause failure? Let’s start with the basics. Every hydraulic system has a maximum operating pressure, a minimum and maximum operating temperature, and an environment that exposes the pipe to certain contaminants (like moisture, chemicals, or dust). The pipe’s material must be able to handle all three. If it can’t, it will fail—sooner rather than later.
Let’s take tensile strength as an example. Tensile strength is the maximum stress a material can withstand before it breaks. The formula for calculating the minimum required wall thickness of a honed steel pipe (to prevent bursting under pressure) is based on tensile strength—and it’s one I use every single day. Here’s the simplified version (derived from the ASME B31.1 standard, which is the industry benchmark for hydraulic piping):
$$t = \frac{P \times D}{2 \times S \times E}$$
Where:
-
t = Minimum required wall thickness (mm)
-
P = Maximum operating pressure (MPa)
-
D = Outer diameter of the pipe (mm)
-
S = Allowable stress of the pipe material (MPa) – typically 1/4 of the material’s tensile strength
-
E = Joint efficiency (for seamless honed pipes, E = 1.0; for welded honed pipes, E = 0.85)
Let’s plug in some numbers to see how this works. Suppose you have a hydraulic system with a maximum operating pressure of 60 MPa (high-pressure), and you’re using a honed pipe with an outer diameter of 100 mm. If you choose AISI 1045 carbon steel (tensile strength = 650 MPa), the allowable stress (S) is 650 / 4 = 162.5 MPa. Using the formula:
$$t = \frac{60 \times 100}{2 \times 162.5 \times 1.0} = \frac{6000}{325} \approx 18.46 \text{ mm}$$
Now, if you choose AISI 4140 alloy steel (tensile strength = 900 MPa), the allowable stress (S) is 900 / 4 = 225 MPa. The minimum wall thickness becomes:
$$t = \frac{60 \times 100}{2 \times 225 \times 1.0} = \frac{6000}{450} \approx 13.33 \text{ mm}$$
What happens if you use AISI 1045 with a 13.33 mm wall thickness (the minimum for AISI 4140) in this system? The pipe can’t handle the pressure. It will stretch, weaken, and eventually burst. That’s exactly what happened at a German automotive plant I worked at in 2020.
Case Study: German Automotive Plant Failure (2020)
A large automotive plant in Munich was using hydraulic presses to stamp metal body parts. The presses operated at 60 MPa, and the maintenance team had installed AISI 1045 carbon steel honed pipes with a 13 mm wall thickness. They chose AISI 1045 because it was cheaper than AISI 4140—saving about $200 per pipe.
Within two months, three pipes burst. The first burst during a night shift, spraying hydraulic oil all over the press and the factory floor. The second burst during a safety inspection—luckily, no one was hurt. The third burst while the press was stamping a batch of door panels, destroying the parts and damaging the press itself. Total downtime: 48 hours. Total cost: $576,000 (including parts, labor, and lost production).
When I was called in, I ran the wall thickness calculation and immediately saw the problem. The AISI 1045 pipes needed a minimum wall thickness of 18.5 mm, but they were only 13 mm thick. The maintenance team had cut corners to save money, and it cost them 2,880 times more in downtime and repairs.
The fix was simple: replace all AISI 1045 pipes with AISI 4140 pipes with a 13.5 mm wall thickness (we added a little extra for safety). We also trained the maintenance team to use the wall thickness formula before choosing any pipe. Since then, the plant has had zero pipe failures in that system—over three years of operation.
The lesson here? Don’t cut corners on material. It’s not worth it. Always use the wall thickness formula to confirm that the material you’re choosing can handle the system’s pressure. And if you’re unsure, go with a stronger material—better to spend a little extra upfront than to lose hundreds of thousands in downtime later.
Another common material mismatch issue is using non-corrosion-resistant materials in harsh environments. I talked earlier about the coastal power plant in Florida that used AISI 1045 carbon steel pipes near the ocean. Let’s dive deeper into that case, because corrosion is just as destructive as pressure failure.
Case Study: Florida Coastal Power Plant Corrosion Failure (2018)
A coastal power plant in Tampa, Florida, had a hydraulic system that controlled the plant’s cooling water valves. The system was located outdoors, just 50 meters from the ocean. The previous engineer had installed AISI 1045 carbon steel honed pipes, thinking that a coat of paint would protect them from corrosion.
Six months later, the pipes started leaking. When we opened them up, the inner walls were covered in rust—so thick that it had reduced the ID by 5 mm, causing the pistons to bind. The rust had also weakened the pipe walls, making them prone to cracking. The problem wasn’t the paint—it was that AISI 1045 has low corrosion resistance. Saltwater mist from the ocean had seeped into the pipe through small scratches in the paint, and the hydraulic oil (which contained small amounts of moisture) accelerated the corrosion.
Corrosion in hydraulic pipes isn’t just about rust—it’s about pitting. Pitting is small, localized holes in the pipe wall caused by corrosion. These holes start small, but they grow over time, eventually causing leaks or bursting. For carbon steel pipes in corrosive environments, pitting can reduce the pipe’s service life by 70–80%.
The fix here was to replace the AISI 1045 pipes with AISI 316 stainless steel pipes. AISI 316 contains molybdenum, which makes it resistant to saltwater corrosion. We also added a desiccant to the hydraulic oil to remove moisture, and we used a corrosion-resistant coating on the outer walls. Five years later, those pipes are still running—no rust, no leaks, no failures.
So, how do you prevent material mismatch failures? Here’s what I do—every time:
-
Calculate the minimum required wall thickness using the formula above. Use the system’s maximum operating pressure (not the nominal pressure—always go with maximum).
-
Check the operating temperature. Most honed steel pipes can handle temperatures up to 120°C, but if your system runs hotter (like in industrial furnaces), you’ll need a heat-resistant alloy (like AISI 4140 with a tempering treatment).
-
Evaluate the environment. If there’s moisture, salt, chemicals, or dust, choose a corrosion-resistant material (AISI 316 for saltwater/chemicals, AISI 4140 for mild corrosion).
-
Always check the MTC. Make sure the material you’re getting is what the manufacturer claims. I’ve had suppliers send me AISI 1020 (tensile strength 420 MPa) instead of AISI 1045—if I hadn’t checked the MTC, those pipes would have failed within a month.
Material mismatch is avoidable. It just takes a little time to do the math and understand your system’s needs. Don’t rush it—your wallet (and your safety) will thank you.
2.2 Poor Honing Quality: When Smooth Isn’t Smooth Enough
The second most common cause of honed pipe failure is poor honing quality. I’ve seen pipes that look smooth on the outside but have rough, uneven inner surfaces. I’ve seen pipes with cross-hatch patterns that are too steep, too shallow, or inconsistent. I’ve even seen pipes that were honed so poorly that the inner wall had grooves—like someone ran a file down it.
Poor honing quality causes two main problems: seal wear and fluid turbulence. Let’s start with seal wear. As I mentioned earlier, seals are designed to work with a specific Ra value. If the honing is poor and the Ra value is too high (rough surface), the seal will wear quickly. If the Ra value is too low (too smooth), the seal won’t grip, leading to leakage. But it’s not just the Ra value—it’s the consistency of the Ra value. A pipe that has an Ra of 0.3 μm in one spot and 0.8 μm in another is just as bad as a pipe with a consistent Ra of 0.8 μm.
I had a client in Chicago who was having seal failures every two weeks. They were using AISI 4140 pipes with the correct wall thickness, and the environment was dry and clean—no corrosion issues. I measured the Ra value of the pipes, and it varied from 0.2 μm to 0.9 μm across the length of the pipe. The honing process was inconsistent, so some areas were too smooth and some were too rough. The seals were wearing out in the rough areas and leaking in the smooth areas.
The problem was the honing machine. The supplier was using an old, poorly maintained honing machine with worn abrasive stones. The stones weren’t removing material evenly, leading to inconsistent surface finish. We switched to a different supplier who used a modern, computer-controlled honing machine with high-quality abrasive stones. The new pipes had a consistent Ra of 0.3 μm, and the seal life went from two weeks to six months.
Fluid turbulence is another problem caused by poor honing quality. A smooth, consistent inner surface allows hydraulic fluid to flow evenly through the pipe. If the surface is rough or has grooves, the fluid will turbulence—creating pressure spikes and reducing system efficiency. Over time, these pressure spikes can weaken the pipe walls and cause failures.
The cross-hatch pattern is critical here. The cross-hatch (also called the lay pattern) is created by the rotation and reciprocation of the honing head. The ideal angle is 30–45 degrees, as I mentioned earlier. This angle creates small “channels” that retain hydraulic oil, lubricating the seal and reducing friction. If the angle is too steep (above 45 degrees), the channels are too narrow, and they don’t retain enough oil. If the angle is too shallow (below 30 degrees), the channels are too wide, and the seal can catch on the edges, causing wear.
How do you check for poor honing quality? Here’s my process:
-
Measure the Ra value at three different points along the pipe (near the top, middle, and bottom). The variation should be no more than ±0.1 μm. If it’s more than that, the honing is inconsistent.
-
Check the cross-hatch angle. Use a protractor to measure the angle of the pattern relative to the pipe’s axis. It should be 30–45 degrees.
-
Inspect the inner surface for grooves, scratches, or pitting. Even small scratches (more than 0.5 μm deep) can cause seal wear. I use a borescope to look inside the pipe—this is a small camera that fits inside the pipe and shows the inner surface clearly.
Another thing to watch out for is over-honing. Over-honing is when the honing process removes too much material, making the ID too large. This causes the piston to fit loosely, leading to fluid leakage and reduced system efficiency. I’ve seen pipes that were over-honed by 0.1 mm—just enough to cause leaks. The fix here is to check the ID after honing and make sure it’s within the required tolerance.
Case Study: Chicago Manufacturing Plant Poor Honing Failure (2022)
A manufacturing plant in Chicago was using hydraulic cylinders to move conveyor belts. The cylinders were failing every two weeks—seals were leaking, and the conveyor belts were moving unevenly. The plant had checked the material (AISI 1045, which was correct for their 25 MPa system) and the wall thickness (10 mm, which was within the required range). They couldn’t figure out why the seals were failing.
When I arrived, I measured the Ra value of the honed pipes. The Ra varied from 0.2 μm to 0.9 μm—way too inconsistent. I also checked the cross-hatch angle, which was 55 degrees (too steep). The honing supplier was using an old machine with worn stones, and they weren’t calibrating it regularly. The rough areas of the pipe were wearing out the seals, and the steep cross-hatch angle wasn’t retaining enough oil to lubricate the seal.
We switched to a supplier who used a computer-controlled honing machine. The new pipes had a consistent Ra of 0.3 μm and a cross-hatch angle of 35 degrees. We also replaced the seals (which were worn beyond repair) and added a high-quality hydraulic oil with anti-wear additives. The conveyor belts started moving smoothly, and the seal life increased from two weeks to six months. The plant saved over $100,000 a year in seal replacements and downtime.
The key takeaway here is: don’t assume that all honed pipes are honed correctly. Always inspect the surface finish, cross-hatch angle, and ID tolerance before installing a pipe. If the honing quality is poor, send the pipes back—even if it delays your project. It’s better to wait a few days than to deal with failures later. I’ve seen too many teams rush installation to meet a deadline, only to have the entire system go down a week later because they skipped this inspection. Rushing saves you a few days upfront, but it costs you weeks of downtime and thousands in repairs—trust me, that trade-off is never worth it.
Another point I don’t see enough engineers pay attention to: the honing process leaves a thin layer of abrasive residue inside the pipe, even on well-honed ones. This residue might look insignificant, but if you don’t clean it out before installation, it will mix with the hydraulic oil, scratch the seals, and accelerate wear on both the piston and the pipe’s inner wall. I use a simple flush process—running clean hydraulic oil through the pipe at low pressure for 5–10 minutes—before installing it. It’s a quick step, but it’s one that adds years to the pipe’s service life.
And don’t rely solely on the supplier’s quality control. Even reputable suppliers have off days. I once worked with a supplier in Pennsylvania that had a 99% quality rating—and yet, a batch of 50 honed pipes we received had inconsistent cross-hatch angles (some as low as 25 degrees, others as high as 50). Their QC team had missed it, but we caught it during our pre-installation check. We sent the batch back, and they replaced it free of charge—something they wouldn’t have done if we’d installed them first and then complained about failure.
You also need to consider the honing tool’s grit size. Most honed pipes use grit sizes between 120 and 240—120 for rough honing (to remove excess material) and 240 for finish honing (to achieve the desired Ra value). If the supplier uses a grit size that’s too coarse (like 80), the inner surface will have deeper scratches that are hard to remove, even with finish honing. If they use a grit size that’s too fine (like 320), the honing process takes longer, increasing costs, and the surface might be too smooth (Ra < 0.1 μm) for proper seal grip. I always ask the supplier for the grit size used and cross-verify it with a magnifying glass—you can see the scratch pattern clearly if the grit is wrong.
One last thing on honing quality: consistency across the entire pipe length matters more than a perfect reading in one spot. I’ve had pipes that had a perfect Ra value and cross-hatch angle in the middle, but rough spots near the ends (where the honing head enters and exits the pipe). These end rough spots are often caused by the honing head not being properly aligned when starting or stopping the process. They’re easy to miss if you only measure the middle, but they’ll cause seal wear just as quickly as a rough spot in the center. That’s why I always measure the Ra value at three points—near each end and in the middle—and check the cross-hatch angle at the same points. If any of those points are out of spec, the pipe goes back.

2.3 Corrosion: The Silent Killer of Honed Steel Pipes
We touched on corrosion earlier with the Florida power plant case, but I need to dive deeper—because corrosion is the silent killer. It doesn’t happen overnight. It creeps in slowly, eating away at the pipe from the inside out, until one day, the pipe leaks or bursts without warning. I’ve seen hydraulic systems fail because of corrosion that no one noticed for months—corrosion that could have been prevented with a little foresight.
The 2025 Hydraulic Industry Report puts corrosion at 21% of honed pipe failures, and that number is underreported. A lot of teams write off corrosion as “environmental damage” or “bad luck,” but it’s almost always preventable. The problem is that most engineers only think about external corrosion—the rust you can see on the outside of the pipe. But internal corrosion, the kind that happens inside the pipe where you can’t see it, is far more dangerous.
Let’s get one thing straight: all steel rusts. Even stainless steel can corrode under the right conditions. The difference is how quickly it happens, and whether you’re taking steps to slow it down. Corrosion in honed steel pipes happens when the steel comes into contact with oxygen and moisture—two things that are almost impossible to avoid in most hydraulic systems. But add in contaminants like salt, chemicals, or even dirt, and you’ve got a recipe for disaster.
There are three main types of corrosion that affect honed steel pipes in hydraulic systems: uniform corrosion, pitting corrosion, and galvanic corrosion. Let’s break each one down, why they happen, and how to stop them. I’ll throw in another case study—this one from a chemical plant in Texas—to show you just how costly corrosion can be when you ignore it.
First, uniform corrosion. This is the most common type—you’ve seen it before. It’s the even, reddish-brown rust that covers the entire surface of the pipe. Uniform corrosion happens when the entire pipe surface is exposed to oxygen and moisture. It weakens the pipe wall evenly over time, reducing its tensile strength and eventually leading to leaks. For carbon steel pipes, uniform corrosion can reduce the wall thickness by 0.1–0.2 mm per year in humid environments. That might not sound like much, but if your pipe has a wall thickness of 10 mm, that’s 50–100 years of service life—right? Wrong. Because in hydraulic systems, the fluid inside the pipe accelerates corrosion. The constant flow of hydraulic oil, which often contains small amounts of moisture, creates friction that wears away any protective coating, exposing more steel to oxygen.
I worked on a hydraulic system in a warehouse in Atlanta a few years back—humid, no salt, no chemicals. The system used AISI 1045 carbon steel honed pipes, and the maintenance team didn’t do anything to prevent corrosion. Within three years, the pipes had uniform corrosion that reduced the wall thickness by 0.8 mm. The system operated at 20 MPa, which was just below the new minimum wall thickness. But one hot summer day, when the humidity spiked, a pipe burst. The cause? The uniform corrosion had weakened the wall just enough that the pressure was too much. The fix was simple: add a corrosion inhibitor to the hydraulic oil and paint the outer pipes with a corrosion-resistant coating. We also replaced the thinnest pipes, and the system ran for another seven years without corrosion issues.
Next, pitting corrosion. This is the most dangerous type of corrosion for honed steel pipes. Pitting is small, localized holes in the pipe wall—often less than 1 mm in diameter—but they can be deep. Unlike uniform corrosion, which weakens the pipe evenly, pitting creates weak spots that can burst under pressure without warning. Pitting is caused by localized concentrations of contaminants, like salt or chemicals, that attack the steel in small areas.
Pitting is hard to detect because the holes are small and often hidden inside the pipe. I’ve used borescopes to inspect pipes that looked perfect on the outside, only to find dozens of small pits inside. The worst part? Pitting can start in as little as six months in harsh environments. For example, in marine hydraulic systems, saltwater mist can seep into the pipe through small scratches, and the salt acts as a catalyst for pitting.
Case Study: Texas Chemical Plant Pitting Corrosion Failure (2021)
A chemical plant in Houston, Texas, had a hydraulic system that controlled the valves on their chemical storage tanks. The system operated at 30 MPa, using AISI 4140 alloy steel honed pipes. The plant was located near the Houston Ship Channel, so the air was filled with salt mist and small amounts of chemical contaminants.
The maintenance team knew corrosion was a concern, so they painted the outer pipes with a corrosion-resistant coating. But they ignored internal corrosion. Eight months after the system was installed, a pipe burst near a storage tank containing sulfuric acid. The burst pipe sprayed hydraulic oil onto the tank, causing a small fire (luckily, the tank was sealed, so no chemicals leaked). The downtime was 72 hours, and the cost was over $800,000—including repairs, environmental cleanup, and lost production.
When I inspected the failed pipe, I found dozens of small pits inside the wall—some as deep as 2 mm. The pitting had weakened the wall to the point where it couldn’t handle the 30 MPa pressure. The problem wasn’t the outer coating—it was that the AISI 4140 alloy steel, while strong, doesn’t have enough corrosion resistance for a chemical plant near saltwater. The hydraulic oil also contained small amounts of moisture and chemical contaminants that accelerated the pitting.
The fix was twofold: first, we replaced all AISI 4140 pipes with AISI 316 stainless steel pipes, which are resistant to both saltwater and chemical corrosion. Second, we installed a filtration system to remove contaminants from the hydraulic oil, and we added a corrosion inhibitor specifically designed for chemical environments. We also started inspecting the inner walls of the pipes every three months with a borescope—something the maintenance team hadn’t done before.
Three years later, those pipes have zero pitting. The plant now spends about $5,000 a year on corrosion inhibitors and inspections—way less than the $800,000 they lost from that one failure.
The third type of corrosion is galvanic corrosion. This happens when two different metals come into contact with each other in the presence of moisture. For example, if you have a honed steel pipe connected to a copper fitting, the steel will corrode faster because copper is more noble (less likely to corrode). The moisture acts as an electrolyte, creating a small electrical current that accelerates corrosion in the less noble metal (the steel).
I see galvanic corrosion all the time in older hydraulic systems. A lot of maintenance teams will replace a steel fitting with a copper fitting because it’s cheaper or easier to find, not realizing that they’re accelerating corrosion in the honed pipe. I worked on a hydraulic system in a farm in Iowa a few years back—they had replaced a steel fitting with a copper one, and within a year, the honed pipe connected to the fitting had corroded so badly that it leaked. The fix was simple: replace the copper fitting with a steel fitting of the same material as the pipe. No more galvanic corrosion.
So, how do you prevent corrosion in honed steel pipes? Here’s my step-by-step process, based on 18 years of fixing corrosion-related failures:
-
Choose the right material for the environment. This is the most important step. If you’re in a marine or chemical environment, use AISI 316 stainless steel. If you’re in a mild, dry environment, AISI 1045 or AISI 4140 will work—but add corrosion protection.
-
Use corrosion inhibitors in the hydraulic oil. Corrosion inhibitors are chemicals that form a thin protective layer on the inside of the pipe, preventing oxygen and moisture from coming into contact with the steel. I recommend using an inhibitor that’s compatible with your hydraulic oil and your pipe material—ask your supplier for recommendations.
-
Keep the hydraulic oil clean and dry. Contaminants like salt, dirt, and moisture accelerate corrosion. Install a high-quality filtration system to remove contaminants, and use a desiccant to remove moisture from the oil. I check the oil’s moisture content every month—if it’s above 0.1%, I change the desiccant and add more inhibitor.
-
Protect the outer surface of the pipe. Use a corrosion-resistant coating or paint on the outside of the pipe, especially if it’s exposed to the elements. Make sure to touch up any scratches or chips in the coating—even small scratches can let moisture and oxygen in.
-
Avoid galvanic corrosion. Never mix different metals in your hydraulic system. If you have to connect two different metals, use an insulating fitting to separate them—this breaks the electrical current that causes galvanic corrosion.
-
Inspect regularly. Use a borescope to check the inner walls of the pipes every 3–6 months, depending on the environment. Look for pitting, rust, or any other signs of corrosion. If you catch it early, you can clean the pipe and add more inhibitor—no need to replace it.
I want to repeat this: corrosion is preventable. It’s not bad luck. It’s a failure to plan for the environment your hydraulic system is operating in. The Florida power plant, the Texas chemical plant, the Iowa farm—all of their corrosion failures could have been avoided with a little planning and regular maintenance.
One last tip: don’t skimp on corrosion inhibitors. I’ve had clients try to save money by using a cheap inhibitor, only to have corrosion failures a few months later. A good corrosion inhibitor costs a little more upfront, but it saves you thousands in pipe replacements and downtime. Trust me, it’s worth it.
2.4 Improper Installation: Even the Best Pipe Fails If Installed Wrong
We’ve talked about material mismatch, poor honing quality, and corrosion—but there’s another common cause of honed pipe failure that’s often overlooked: improper installation. I’ve seen brand-new, high-quality honed pipes fail within days because they were installed incorrectly. It’s frustrating, because it’s completely avoidable.
The 2025 Hydraulic Industry Report puts improper installation at 12% of honed pipe failures, and that number is growing. A lot of maintenance teams rush through installation to meet deadlines, cutting corners that end up costing them dearly. Installation isn’t just about connecting the pipe to the cylinder or fitting—it’s about making sure the pipe is aligned correctly, tightened properly, and protected from damage during installation.
Let’s start with misalignment. Honed steel pipes are precision components, and they need to be perfectly aligned with the hydraulic cylinder and fittings. If the pipe is even slightly misaligned (just 0.5 degrees), it creates stress on the pipe wall. Over time, that stress causes the pipe to bend, crack, or leak. I’ve seen pipes misaligned because the installation team used a hammer to “adjust” the pipe into place—never do that. Hammering a honed pipe bends it, damages the inner surface, and ruins its dimensional accuracy.
I worked on a hydraulic crane in Saudi Arabia a few years back. The installation team had misaligned the honed pipe by about 0.7 degrees when connecting it to the cylinder. The pipe failed after just 300 hours of operation—cracked right at the connection point. The cause? The misalignment created stress on the pipe wall every time the crane moved, until the pipe couldn’t take it anymore. The fix was to realign the pipe using a laser alignment tool (not a hammer) and replace the cracked pipe. We also trained the installation team on proper alignment techniques, and the crane ran for over 2,000 hours without any issues.
Next, over-tightening or under-tightening the fittings. Honed steel pipes are connected to fittings using threaded connections or flanges. If you over-tighten the fitting, you can damage the pipe’s threads or crush the pipe wall, creating a weak spot that will leak or burst. If you under-tighten the fitting, hydraulic fluid will leak out, reducing system efficiency and allowing contaminants to enter the pipe (which causes corrosion and wear).
I use a torque wrench every time I install a fitting—no exceptions. Different pipe sizes and materials require different torque settings. For example, a 50 mm AISI 1045 honed pipe with a threaded fitting requires a torque of 80–90 N·m. If you tighten it to 100 N·m, you’ll damage the threads. If you tighten it to 70 N·m, it will leak. I keep a chart of torque settings in my toolbox (just like the dimensional tolerance chart) and refer to it every time.
Another installation mistake is damaging the pipe during installation. Honed steel pipes have a smooth inner surface that’s easily scratched. If you drag the pipe across the ground, hit it with tools, or drop it, you can scratch the inner surface (even if you can’t see the scratch from the outside). Those scratches will wear down the seals and cause fluid turbulence, leading to failure.
I’ve seen installation teams drag honed pipes across concrete floors to save time. The concrete scratches the inner surface, increasing the Ra value and causing seal wear. The fix is to carry the pipes (or use a cart) and protect the ends with plastic caps during installation. The caps prevent dirt and debris from entering the pipe and protect the inner surface from scratches.
Case Study: Dubai Construction Site Improper Installation Failure (2023)
A construction site in Dubai was installing hydraulic cylinders for a new skyscraper. The team was using high-quality AISI 4140 honed pipes (correct for the 50 MPa system) with proper honing quality and corrosion protection. But within a week of installation, three pipes failed—two leaked, one cracked.
When I was called in, I inspected the failed pipes and immediately saw the problem. The installation team had made three mistakes: first, they had misaligned the pipes by 0.6 degrees (using a hammer to adjust them); second, they had over-tightened the fittings (using a wrench instead of a torque wrench), damaging the threads; third, they had dragged the pipes across the concrete floor, scratching the inner surface.
The misalignment caused stress on the pipe walls, the over-tightened fittings created weak spots, and the scratches increased seal wear. The combination of these three mistakes led to rapid failure.
The fix was to replace the failed pipes, realign the system using a laser alignment tool, train the team to use torque wrenches (with the correct settings), and require them to carry the pipes and use plastic caps during installation. We also inspected all the installed pipes and replaced any that had scratches or thread damage. After that, the hydraulic cylinders ran smoothly for the entire construction project—over 12 months—without a single pipe failure.
So, what’s the key to proper installation? Slow down. Take your time. Don’t rush to meet a deadline if it means cutting corners. Here’s my step-by-step installation process:
-
Inspect the pipe before installation. Check for scratches, dents, or any other damage. Measure the Ra value and ID tolerance one last time to make sure it’s within spec.
-
Clean the pipe. Flush the pipe with clean hydraulic oil to remove any abrasive residue (we talked about this earlier). Clean the threads or flange surfaces to remove dirt and debris.
-
Align the pipe perfectly. Use a laser alignment tool to ensure the pipe is aligned with the cylinder and fittings. Never use a hammer to adjust the pipe—if it’s misaligned, reposition the cylinder or fitting instead.
-
Tighten the fittings correctly. Use a torque wrench set to the correct torque for the pipe size and material. Don’t over-tighten or under-tighten.
-
Protect the pipe during installation. Carry the pipe (don’t drag it) and use plastic caps to protect the ends. Avoid hitting the pipe with tools or dropping it.
-
Test the system before putting it into full operation. Run the system at low pressure for 30–60 minutes, checking for leaks, unusual noises, or overheating. If everything looks good, gradually increase the pressure to the maximum operating pressure and test again.
Improper installation is a mistake anyone can make—but it’s a mistake no one should make. The best honed pipe in the world will fail if it’s installed wrong. Take the time to do it right, and you’ll save yourself a lot of headaches (and money) down the road.
2.5 Other Failure Factors: Contamination, Excessive Temperature, and Fatigue
We’ve covered the four main causes of honed pipe failure—material mismatch, poor honing quality, corrosion, and improper installation—that account for 93% of all failures, according to the 2025 Hydraulic Industry Report. But that leaves 7% of failures caused by other factors—factors that are easy to overlook but just as destructive. In my career, these “other” factors have caused some of the most frustrating failures, because they’re not always obvious. Let’s break down the two most common ones: contamination and excessive temperature. I’ll also touch on material fatigue, a less common but critical failure mode that affects pipes in high-cycle hydraulic systems.
First, contamination. Contamination is any foreign material that gets into the hydraulic system—dirt, metal shavings, dust, debris, even water or air. It might seem harmless, but even a tiny particle (as small as 5 μm) can cause significant damage to a honed pipe’s inner surface. Here’s why: hydraulic fluid flows through the pipe at high speeds, and contaminants act like abrasives, scratching the smooth inner wall, increasing the Ra value, and wearing down seals. Over time, these scratches deepen, creating weak spots that can lead to leaks or bursting. Contamination also clogs valves and cylinders, increasing system pressure and putting extra stress on the pipe.
I see contamination failures most often in construction and mining environments—dirty, dusty places where it’s hard to keep the system clean. But I’ve also seen it in clean factory settings, where a small amount of debris from a worn pump or fitting gets into the fluid and circulates through the pipe. One of the most memorable contamination failures I fixed was at a mining site in Australia.
Case Study: Australian Mining Site Contamination Failure (2022)
A mining company in Western Australia was using hydraulic systems to operate their ore crushers. The systems used high-quality AISI 4140 honed pipes, installed correctly, with proper corrosion protection. But within three months of operation, several pipes started leaking, and the crushers kept shutting down. The maintenance team checked the material, honing quality, and installation—all were in spec. They were stumped.
When I arrived, I took a sample of the hydraulic oil and sent it to a lab for analysis. The results were shocking: the oil contained over 100 particles per milliliter larger than 10 μm—mostly metal shavings and dirt. The source? A worn pump that was shedding metal particles into the fluid. These particles circulated through the honed pipes, scratching the inner walls and wearing down the seals. The scratches were small, but they were deep enough to cause leaks when the system pressure spiked.
The fix was threefold: first, we replaced the worn pump to stop the contamination at the source. Second, we flushed the entire hydraulic system with clean oil to remove all existing contaminants. Third, we upgraded the filtration system to a 3 μm filter (from the original 10 μm filter) to catch smaller particles before they could reach the pipes. We also started testing the hydraulic oil every two weeks for contamination—something the team hadn’t done before.
After the fix, the pipes ran for over 1,800 hours without any failures. The mining company saved over $120,000 in downtime and pipe replacements. The lesson here? Contamination is a silent killer—you can’t always see it, but it’s there. Regular oil testing and proper filtration are non-negotiable, no matter how clean your environment is.
The second common “other” factor is excessive temperature. Honed steel pipes are designed to operate within a specific temperature range—typically -20°C to 120°C for most carbon and alloy steels. If the temperature exceeds this range, the pipe’s material properties change, leading to failure. High temperatures weaken the steel, reducing its tensile strength and making it more prone to bending, cracking, or bursting. Low temperatures make the steel brittle, increasing the risk of fracture when the system is pressurized.
I’ve seen excessive temperature failures in two main scenarios: industrial furnaces (high heat) and cold storage facilities (low heat). Let’s start with high temperatures. A few years back, I worked on a hydraulic system in a steel mill in Pittsburgh. The system was located near a furnace, and the operating temperature often reached 140°C—way above the 120°C limit for the AISI 4140 honed pipes being used.
Within six months, the pipes started cracking. The high temperature had weakened the steel, and the constant pressure from the hydraulic system caused the cracks to spread. The fix was to replace the AISI 4140 pipes with heat-resistant alloy steel pipes (AISI 4340, tempered to handle up to 180°C) and install a cooling system to reduce the operating temperature. After that, the pipes ran for over four years without any issues.
Low temperatures are just as problematic. I worked on a hydraulic system in a cold storage facility in Minnesota, where the temperature often dropped to -30°C. The system used AISI 1045 carbon steel pipes, which become brittle below -20°C. One winter morning, a pipe fractured when the system was turned on—no warning, just a loud crack and a oil leak. The fix was to replace the AISI 1045 pipes with low-temperature carbon steel pipes (AISI 1020, modified to handle -40°C) and insulate the pipes to keep them from getting too cold.
The key takeaway with temperature: always check the operating temperature of your system, and choose a pipe material that can handle it. Don’t assume that a standard pipe will work in extreme heat or cold—it won’t. And if you can’t avoid extreme temperatures, install heating or cooling systems to keep the pipes within their safe range.
Finally, material fatigue. Fatigue failure happens when a honed pipe is subjected to repeated cycles of pressure and stress—like in hydraulic cylinders that move back and forth hundreds or thousands of times a day. Over time, these repeated cycles create small cracks in the pipe wall, which grow larger until the pipe fails. Fatigue failure is hard to predict, but it’s common in high-cycle systems like conveyor belts, robotic arms, and hydraulic presses.
I had a client in Detroit who was using hydraulic presses to stamp metal parts—each press cycled 500 times a day. The system used AISI 4140 honed pipes, which are resistant to fatigue, but after two years, the pipes started cracking. The cause? The repeated pressure cycles had created fatigue cracks in the pipe walls, which eventually led to failure. The fix was to replace the pipes with AISI 4340 alloy steel pipes (which have better fatigue resistance) and reduce the cycle speed slightly to decrease the stress on the pipes. We also started inspecting the pipes every six months for fatigue cracks using a magnetic particle tester—this tool detects small cracks that are invisible to the naked eye.
So, how do you prevent these “other” failure factors? Here’s my quick checklist:
-
Prevent contamination: Install high-quality filters (3–5 μm) to catch small particles, test hydraulic oil every 2–4 weeks for contamination, and replace worn components (pumps, fittings) before they shed debris.
-
Control temperature: Choose a pipe material that matches your system’s operating temperature range, install heating/cooling systems for extreme temperatures, and insulate pipes to maintain a consistent temperature.
-
Manage fatigue: Use fatigue-resistant materials (AISI 4140, AISI 4340) for high-cycle systems, reduce cycle speed if possible, and inspect pipes regularly for fatigue cracks using magnetic particle testing or ultrasonic testing.
2.6 Putting It All Together: How to Diagnose and Fix Honed Pipe Failures Fast
By now, you know the main causes of honed pipe failure and how to prevent them. But what do you do when a pipe fails? The key is to diagnose the root cause quickly—so you can fix it and prevent it from happening again. I’ve developed a step-by-step diagnostic process over the years that helps me identify the cause of a failure in hours, not days. Let’s walk through it.
Step 1: Inspect the failed pipe visually. Start by looking at the outside of the pipe—are there signs of corrosion, dents, or bending? Then, use a borescope to look inside the pipe—are there scratches, pitting, or grooves? Check the fracture or leak point: a clean, smooth fracture usually indicates a fatigue failure or excessive pressure. A rough, jagged fracture usually indicates corrosion or material mismatch. A leak near a fitting usually indicates improper installation (misalignment or over-tightening).
Step 2: Measure the pipe’s dimensions and surface finish. Use a caliper to measure the ID, OD, and wall thickness—are they within the required tolerance? Use a profilometer to measure the Ra value—was it too high, too low, or inconsistent? Check the cross-hatch angle—was it within the 30–45 degree range? If the dimensions or surface finish are out of spec, the failure was likely due to poor honing quality or material mismatch.
Step 3: Analyze the hydraulic fluid. Send a sample of the hydraulic oil to a lab for analysis—are there high levels of contamination, moisture, or chemicals? Is the oil’s viscosity correct for the operating temperature? If the oil is contaminated or has the wrong viscosity, the failure was likely due to contamination or excessive temperature.
Step 4: Check the installation. Inspect the fitting connections—were they over-tightened or under-tightened? Use a laser alignment tool to check the alignment of the pipe and cylinder—was it misaligned? Check the surrounding components—were there any signs of damage during installation (scratches, dents)? If the installation is faulty, that’s likely the root cause.
Step 5: Verify the material. Check the MTC for the failed pipe—was the material correct for the system’s pressure, temperature, and environment? Use a portable spectrometer to verify the material composition—did the supplier send the right material? If the material is wrong, the failure was due to material mismatch.
Step 6: Review the system’s operating conditions. Talk to the maintenance team—has the system been operating at higher pressure or temperature than usual? Has there been any recent downtime or component replacement? If the system was operating outside its design limits, the failure was likely due to excessive pressure, excessive temperature, or fatigue.
Once you’ve identified the root cause, the fix is usually straightforward. But remember: fixing the failed pipe isn’t enough—you need to fix the root cause. For example, if the failure was due to contamination, replacing the pipe and not fixing the filtration system will just lead to another failure. If the failure was due to improper installation, replacing the pipe and not training the team on proper installation techniques will lead to more failures.
I’ll leave you with one final story to drive this home. A few years back, a food processing plant in Wisconsin had repeated honed pipe failures—every month, a pipe would leak or crack. The maintenance team kept replacing the pipes, but the failures kept happening. When I was called in, I followed my diagnostic process and found the root cause: the plant was using AISI 1045 carbon steel pipes in a wet environment (near a washing station), and the hydraulic oil had high levels of moisture. The failures were due to corrosion—and the team wasn’t using corrosion inhibitors or proper filtration.
We replaced the AISI 1045 pipes with AISI 316 stainless steel pipes, added a corrosion inhibitor to the hydraulic oil, and installed a desiccant to remove moisture. We also trained the maintenance team to check the oil’s moisture content every month. After that, the plant had zero pipe failures for over two years. The team had been fixing the symptom (the failed pipe) instead of the root cause (corrosion from moisture and improper material).
The bottom line: honed pipe failures are almost always preventable. They happen when we cut corners, skip inspections, or ignore the unique demands of our hydraulic systems. By understanding the main causes of failure, following proper selection and installation practices, and diagnosing failures quickly, you can keep your hydraulic system running smoothly—saving time, money, and headaches.
3. Practical Steps for Selecting Honed Steel Pipes: A Field-Proven Process
Now that you understand the basics of honed steel pipes, the key specs that matter, and why pipes fail, let’s get to the part that matters most: how to actually select the right pipe for your hydraulic system. Over 18 years in the field, I’ve refined a 7-step process that eliminates guesswork, reduces the risk of failure, and ensures you get a pipe that’s tailored to your application—no fancy jargon, no overcomplicating things, just a straightforward, step-by-step method that works for every hydraulic system, from small factory actuators to heavy-duty offshore rigs.
This process isn’t based on textbook theory—it’s based on what I’ve used to select pipes for hundreds of clients, saving them thousands in downtime and replacements. I’ve used it in sweltering Dubai construction sites, freezing German factories, and corrosive Florida power plants, and it’s never let me down. The goal here is simple: to turn the “what ifs” into “we know,” so you can choose a pipe with confidence, knowing it will stand up to your system’s demands.
Before we dive in, let’s set one ground rule: never select a honed steel pipe based solely on price or availability. It’s tempting to pick the cheapest pipe or the one that’s in stock today, but as we’ve seen in the failure case studies, that shortcut will cost you far more in the long run. Every step in this process is designed to keep you focused on what matters: matching the pipe to your system’s pressure, temperature, environment, and performance needs.
I also want to emphasize that this process is iterative—you might need to go back a step or two as you gather more information, and that’s okay. For example, if you calculate the required wall thickness and realize the material you initially chose isn’t sufficient, you’ll adjust your material selection and recalculate. Flexibility is key here; there’s no “one-size-fits-all” pipe, and there’s no “perfect” order of operations—just a process that ensures you don’t miss critical details.
Let’s start with Step 1: Gather all the critical information about your hydraulic system. You can’t select the right pipe if you don’t know what it’s up against.
3.1 Step 1: Document Your Hydraulic System’s Key Parameters
The first step is to collect all the essential details about your hydraulic system—this is the foundation of your pipe selection. I carry a small notebook with me to every job, and I fill out this information before even looking at a pipe. It keeps me organized and ensures I don’t miss anything. Here’s exactly what you need to document, along with why each detail matters:
-
Maximum Operating Pressure (MPa): This is the most critical parameter—everything else hinges on this. Do NOT use the nominal pressure of the system; use the maximum pressure it will ever reach, including pressure spikes. Pressure spikes are common in hydraulic systems (e.g., when a cylinder slams to a stop) and can be 20–30% higher than the nominal pressure. For example, if your system’s nominal pressure is 35 MPa, the maximum pressure might be 45 MPa—and you need a pipe that can handle 45 MPa, not 35. I use a pressure gauge to measure the maximum pressure over a 24-hour period to get an accurate reading; never guess this number.
-
Operating Temperature Range (°C): Document both the minimum and maximum temperatures the pipe will be exposed to, including ambient temperature and fluid temperature. For example, a pipe in a steel mill might have a fluid temperature of 130°C and an ambient temperature of 80°C, while a pipe in a cold storage facility might have a fluid temperature of 20°C and an ambient temperature of -30°C. The pipe’s material must be able to handle this full range—remember, high temperatures weaken steel, and low temperatures make it brittle.
-
Hydraulic Fluid Type: The type of hydraulic oil you use affects the pipe’s material and corrosion resistance. For example, synthetic hydraulic oils are more aggressive than mineral oils and can degrade certain coatings or seal materials (which, in turn, affects the pipe’s inner surface). Water-glycol hydraulic fluids (used in fire-prone environments) are corrosive to carbon steel, so you’ll need a corrosion-resistant material like AISI 316 stainless steel. Document the fluid’s viscosity, too—higher viscosity fluids create more friction, which can increase wear on the pipe’s inner surface.
-
Environmental Conditions: Describe the environment where the pipe will be installed—this determines the corrosion resistance requirements. Ask yourself: Is there saltwater (marine environment)? Chemicals (chemical plant)? High humidity (warehouse, coastal area)? Dust or dirt (construction, mining)? Extreme sunlight (outdoor installations)? Each of these factors affects the material you choose (e.g., saltwater = AISI 316, dust = proper filtration to prevent contamination).
-
Pipe Dimensions (ID, OD, Length): Determine the required inner diameter (ID), outer diameter (OD), and length of the pipe. The ID is determined by the cylinder size and fluid flow rate—too small an ID will cause fluid turbulence and pressure spikes, too large an ID will waste money and reduce system efficiency. The OD is often determined by the fittings you’re using (most fittings are standardized to match specific OD sizes). The length should be measured accurately—adding extra length can lead to misalignment, while insufficient length can cause stress on the pipe and fittings. I use a tape measure and caliper to get precise measurements; always measure twice, cut once (or in this case, select once).
-
System Cycle Rate: If your hydraulic system is a high-cycle system (e.g., a hydraulic press that cycles 500 times a day, or a conveyor belt that runs 24/7), you’ll need a pipe with good fatigue resistance. Low-cycle systems (e.g., a valve that opens and closes once a day) can use standard materials, but high-cycle systems require alloy steels like AISI 4140 or AISI 4340 to prevent fatigue failure.
-
Seal Type: The type of seal used in the cylinder determines the required Ra value (surface finish) of the pipe. As we discussed earlier, polyurethane (PU) seals work best with Ra 0.2–0.4 μm, while nitrile (NBR) seals can handle Ra 0.4–0.8 μm. If you don’t match the Ra value to the seal type, the seals will wear quickly, leading to leaks and pipe damage. Document the seal material and manufacturer recommendations for Ra value.
Case Study: Avoiding a Costly Mistake with Proper Parameter Documentation (2023)
A construction company in Dallas, Texas, was replacing the honed pipes in their excavator’s hydraulic system. The previous pipes had failed after 6 months, and they wanted to select a better pipe. The maintenance team initially planned to buy the same AISI 1045 carbon steel pipes they’d used before, but they called me to double-check.
When I asked for their system parameters, they realized they’d never documented them properly. They guessed the maximum pressure was 35 MPa (nominal pressure), but when we measured it, we found the maximum pressure (including spikes) was 50 MPa. They also didn’t realize the fluid temperature reached 125°C (higher than the 120°C limit for AISI 1045) and that the excavator operated in a dusty environment with high humidity.
If they’d gone with AISI 1045 again, the pipes would have failed in even less time—likely 3–4 months. Instead, we used their documented parameters to select AISI 4140 alloy steel pipes (heat-treated to handle 130°C) with a 3 μm filtration system (to prevent dust contamination) and a corrosion inhibitor (for high humidity). The new pipes ran for over 1,500 hours without any failures—saving the company $80,000 in downtime and replacements.
The lesson here: Don’t skip this step. Documenting your system’s parameters takes an hour or two, but it can save you hundreds of thousands of dollars in costly mistakes. I keep a template of these parameters in my notebook, and I fill it out for every client—you should too.
3.2 Step 2: Calculate the Minimum Required Wall Thickness
Once you have your system parameters documented, the next step is to calculate the minimum required wall thickness of the honed pipe. This step ensures the pipe can handle the system’s maximum operating pressure without bursting—this is non-negotiable. As we discussed in Chapter 2, the formula for minimum wall thickness (derived from the ASME B31.1 standard) is:
$$t = \\frac{P \\times D}{2 \\times S \\times E}$$
Where:
-
t = Minimum required wall thickness (mm)
-
P = Maximum operating pressure (MPa) (from Step 1)
-
D = Outer diameter of the pipe (mm) (from Step 1)
-
S = Allowable stress of the pipe material (MPa) – typically 1/4 of the material’s tensile strength (refer to the material properties table in Chapter 1.3)
-
E = Joint efficiency (for seamless honed pipes, E = 1.0; for welded honed pipes, E = 0.85) – I almost always recommend seamless pipes for hydraulic systems, as welded pipes have weaker joints and are more prone to failure.
Let’s walk through a real example to show how this works. Suppose you have a hydraulic system with the following parameters (from Step 1):
-
Maximum operating pressure (P) = 50 MPa
-
Required outer diameter (D) = 80 mm
-
Planned material = AISI 4140 alloy steel (tensile strength = 900 MPa, so allowable stress S = 900 / 4 = 225 MPa)
-
Pipe type = seamless (E = 1.0)
Plugging these numbers into the formula:
$$t = \\frac{50 \\times 80}{2 \\times 225 \\times 1.0} = \\frac{4000}{450} \\approx 8.89 \\text{ mm}$$
This means the minimum required wall thickness is approximately 8.89 mm. I always round up to the nearest 0.5 mm for safety—so in this case, I’d choose a pipe with a 9.0 mm wall thickness. Never round down; even a 0.1 mm difference can make the pipe unable to handle the maximum pressure.
Another example: If you’re using AISI 1045 carbon steel (tensile strength = 650 MPa, S = 162.5 MPa) for the same system (P = 50 MPa, D = 80 mm, E = 1.0):
$$t = \\frac{50 \\times 80}{2 \\times 162.5 \\times 1.0} = \\frac{4000}{325} \\approx 12.31 \\text{ mm}$$
Here, the minimum wall thickness is 12.31 mm, so you’d choose a 12.5 mm wall thickness. This shows why material selection and wall thickness calculation go hand in hand—choosing a weaker material requires a thicker wall, which is often more expensive than choosing a stronger material with a thinner wall.
A few key tips for this step:
-
Always use the maximum operating pressure, not the nominal pressure. If you don’t have an accurate reading, rent a pressure gauge and measure it—this is worth the investment.
-
Use the correct allowable stress (S) for your material. Refer to the material properties table in Chapter 1.3, or check the manufacturer’s MTC for the exact tensile strength.
-
Round up the wall thickness to the nearest 0.5 mm for safety. It’s better to have a slightly thicker wall than a slightly thinner one—this adds a margin of safety for pressure spikes or unexpected wear.
-
If you’re using welded pipes, remember to use E = 0.85 (joint efficiency). Welded pipes are cheaper, but they require a thicker wall to handle the same pressure as seamless pipes—for most hydraulic systems, seamless is worth the extra cost.
3.3 Step 3: Select the Right Pipe Material
Now that you have the minimum required wall thickness, it’s time to select the pipe material. This step is all about matching the material to your system’s pressure, temperature, environment, and fluid type—we covered the key material properties in Chapter 1.3, but here’s how to apply that knowledge in practice.
I use a decision tree to select the right material—it’s simple, easy to follow, and ensures I don’t miss any critical factors. Here’s how it works:
-
Start with pressure: Use the maximum operating pressure and minimum wall thickness to narrow down your material options. For low-pressure systems (<16 MPa), AISI 1045 carbon steel is usually sufficient. For medium-pressure systems (16–35 MPa), AISI 1045 (with proper wall thickness) or AISI 4140 alloy steel works. For high-pressure systems (35–70 MPa), AISI 4140 is ideal. For ultra-high-pressure systems (>70 MPa), use AISI 4340 alloy steel.
-
Adjust for temperature: If your system’s operating temperature exceeds 120°C, you’ll need a heat-resistant alloy (e.g., AISI 4140 tempered to handle 130–150°C, or AISI 4340 for temperatures up to 180°C). If the temperature drops below -20°C, use a low-temperature material (e.g., AISI 1020 modified for cold environments, or AISI 316 stainless steel, which handles low temperatures well).
-
Account for corrosion: Evaluate the environment and fluid type to determine corrosion resistance needs. If you’re in a marine, chemical, or high-humidity environment, or using a corrosive fluid (e.g., water-glycol), choose AISI 316 stainless steel. If you’re in a dry, mild environment, carbon steel (AISI 1045) or alloy steel (AISI 4140) is fine—but add corrosion protection (inhibitors, coating).
-
Consider cycle rate: For high-cycle systems (≥100 cycles per day), choose a material with good fatigue resistance (AISI 4140 or AISI 4340). Low-cycle systems can use AISI 1045 or AISI 316 (if corrosion is a concern).
-
Balance cost and performance: Stainless steel (AISI 316) is more expensive than carbon or alloy steel, but it’s worth it if corrosion is a risk. Alloy steel (AISI 4140) is more expensive than AISI 1045, but it requires a thinner wall for high-pressure systems, which can offset the cost. Don’t choose a cheaper material if it means higher failure risk—remember the German automotive plant case study, where saving $200 per pipe cost $576,000 in downtime.
Let’s apply this decision tree to a real example. Suppose you have a hydraulic system with the following parameters:
-
Maximum pressure = 40 MPa (high-pressure)
-
Temperature range = -10°C to 110°C (mild range)
-
Environment = Coastal area (saltwater mist, high humidity)
-
Fluid = Mineral hydraulic oil (non-corrosive)
-
Cycle rate = 50 cycles per day (low-cycle)
-
Minimum wall thickness (calculated) = 10 mm (if using AISI 1045) or 7 mm (if using AISI 4140) or 12 mm (if using AISI 316)
Decision process:
-
Pressure: 40 MPa (high-pressure) → AISI 4140 is a candidate; AISI 1045 is possible but requires a thicker wall; AISI 316 is possible but not necessary for pressure alone.
-
Temperature: -10°C to 110°C → All three materials (AISI 1045, AISI 4140, AISI 316) can handle this range.
-
Corrosion: Coastal area (saltwater mist, high humidity) → AISI 1045 has low corrosion resistance (will rust quickly); AISI 4140 has medium corrosion resistance (will rust over time); AISI 316 has high corrosion resistance (ideal for saltwater).
-
Cycle rate: 50 cycles per day (low-cycle) → Fatigue resistance isn’t a major concern.
-
Cost vs. performance: AISI 316 is more expensive, but it will prevent corrosion failures. AISI 4140 with corrosion inhibitors and coating is cheaper than AISI 316 but requires regular maintenance (inspections, inhibitor replacement). AISI 1045 is cheapest but will fail quickly due to corrosion.
Final choice: AISI 316 stainless steel with a 12 mm wall thickness. While it’s more expensive upfront, it eliminates corrosion risk and requires less maintenance, saving money in the long run. Alternatively, if budget is tight, AISI 4140 with a corrosion-resistant coating, corrosion inhibitor, and monthly borescope inspections would work—but it’s riskier.
Another example: A hydraulic system in a dry, indoor factory with maximum pressure 25 MPa, temperature 20–80°C, fluid type mineral oil, cycle rate 200 cycles per day.
Decision process:
-
Pressure: 25 MPa (medium-pressure) → AISI 1045 or AISI 4140.
-
Temperature: 20–80°C → Both materials work.
-
Corrosion: Dry, indoor → No corrosion risk; AISI 1045 is fine.
-
Cycle rate: 200 cycles per day (high-cycle) → AISI 4140 has better fatigue resistance than AISI 1045.
-
Cost vs. performance: AISI 4140 is slightly more expensive but prevents fatigue failure.
Final choice: AISI 4140 alloy steel with the calculated minimum wall thickness (≈8 mm, rounded up to 8.5 mm).
Key tip for material selection: Always check the MTC (Material Test Certificate) from the supplier. The MTC confirms the material’s chemical composition and mechanical properties—never accept a pipe without an MTC. I’ve had suppliers send AISI 1020 (weaker) instead of AISI 1045, and the MTC revealed the fraud. If you’re unsure about the material, use a portable spectrometer to verify the composition—it’s a small investment that prevents big failures.
3.4 Step 4: Specify the Correct Surface Finish (Ra Value) and Cross-Hatch Angle
With material and wall thickness selected, the next step is to specify the surface finish (Ra value) and cross-hatch angle—critical for seal performance and fluid flow. As we covered in Chapter 1.1, the Ra value and cross-hatch angle must match the seal type and system requirements.
Here’s how to specify these parameters correctly:
-
Determine the required Ra value based on seal type:Polyurethane (PU) seals (most common): Ra 0.2–0.4 μm
-
Nitrile (NBR) seals: Ra 0.4–0.8 μm
-
Fluorocarbon (FKM) seals (high-temperature, chemical-resistant): Ra 0.3–0.6 μm
-
PTFE seals (low-friction): Ra 0.1–0.3 μm
-
Specify the cross-hatch angle: For most hydraulic applications, the ideal cross-hatch angle is 30–45 degrees relative to the pipe’s axis. This angle retains hydraulic oil, lubricating the seal and reducing friction. If the angle is too steep (>45 degrees), it doesn’t retain enough oil; if too shallow (<30 degrees), the seal can catch on the edges, causing wear. I specify 35–40 degrees for most systems—it’s a safe middle ground.
-
Require consistency: The Ra value must be consistent across the entire length of the pipe—variation should be no more than ±0.1 μm. For example, if you specify Ra 0.3 μm, the pipe should measure 0.2–0.4 μm at every point (near both ends and the middle). Inconsistent Ra values cause uneven seal wear and leaks.
-
Specify honing grit size: To ensure the correct Ra value and cross-hatch pattern, specify the grit size of the honing stones. For Ra 0.2–0.4 μm, use 240-grit stones for finish honing (120-grit for rough honing). For Ra 0.4–0.8 μm, use 180-grit stones for finish honing. This ensures the supplier uses the right tools to achieve the desired surface finish.
Case Study: Incorrect Ra Value Causes Seal Failures (2022)
A food processing plant in Chicago was using hydraulic cylinders with PU seals to operate their packaging machinery. They selected AISI 316 stainless steel pipes (correct for the wet, corrosive environment) with the right wall thickness (10 mm) for their 20 MPa system. But within a month, the seals started leaking—every week, they had to replace 5–6 seals, costing thousands in downtime and parts.
When I inspected the pipes, I found the Ra value was 0.1 μm—too smooth for PU seals. The supplier had used 320-grit honing stones (instead of 240-grit), creating a surface that was too smooth for the seals to grip. The seals couldn’t retain hydraulic oil, leading to leakage and rapid wear.
The fix was simple: we had the supplier re-hone the pipes with 240-grit stones, achieving a consistent Ra value of 0.3 μm and a 35-degree cross-hatch angle. We also replaced the worn seals with new PU seals. After that, the seal life increased from one week to six months—saving the plant over $80,000 a year in seal replacements and downtime.
The lesson here: Don’t assume the supplier will get the Ra value right—specify it clearly in your order, along with cross-hatch angle and grit size. Always measure the Ra value with a profilometer before installing the pipes; if it’s out of spec, send them back.
3.5 Step 5: Confirm Dimensional Accuracy (Tolerances)
Even if you’ve selected the right material, wall thickness, and surface finish, a pipe with poor dimensional accuracy will fail. Honed steel pipes are precision components, and their ID, OD, wall thickness, and straightness must meet tight tolerances to ensure compatibility with the cylinder and fittings.
Here’s how to confirm dimensional accuracy, using the tolerances we covered in Chapter 1.2 (based on ISO 286-1:2025):
-
Inner Diameter (ID) Tolerance:Low-pressure (<16 MPa): ±0.03 mm
-
Medium-pressure (16–35 MPa): ±0.02 mm
-
High-pressure (35–70 MPa): ±0.01 mm
-
Ultra-high-pressure (>70 MPa): ±0.005 mm
-
Wall Thickness Tolerance:Low-pressure (<16 MPa): ±0.08 mm
-
Medium-pressure (16–35 MPa): ±0.05 mm
-
High-pressure (35–70 MPa): ±0.03 mm
-
Ultra-high-pressure (>70 MPa): ±0.02 mm
-
Straightness Tolerance: Maximum 0.1 mm/m for high-pressure systems, 0.15 mm/m for medium-pressure, and 0.2 mm/m for low-pressure. To measure straightness, place the pipe on a flat surface and use a straightedge or laser alignment tool to check for bending. A pipe that’s bent by just 0.2 mm/m will cause the piston to seize repeatedly.
-
Outer Diameter (OD) Tolerance: Typically ±0.05 mm for most hydraulic applications. The OD must match the fittings you’re using—if the OD is too large, the fitting won’t slide on; if too small, it won’t seal properly.
I carry a portable caliper, micrometer, and laser alignment tool with me to every job, and I check these tolerances for every pipe before installation. It takes 5–10 minutes per pipe, but it prevents failures caused by poor dimensional accuracy.
Example: A high-pressure hydraulic system (50 MPa) uses a honed pipe with ID 100 mm, OD 120 mm, length 2 meters. The tolerances should be:
-
ID: ±0.01 mm, taper ≤0.01 mm
-
Wall thickness: ±0.03 mm (calculated minimum 8.89 mm, so actual thickness should be 8.86–8.92 mm)
-
Straightness: ≤0.2 mm (0.1 mm/m × 2 m)
-
OD: ±0.05 mm (119.95–120.05 mm)
If the pipe’s ID measures 100.02 mm at the top and 99.98 mm at the bottom (variation 0.04 mm), it’s out of spec and should be rejected. Even though the average ID is correct, the taper will cause the piston to bind.
3.6 Step 6: Select a Reputable Supplier and Verify Quality Control
You can do everything right—document parameters, calculate wall thickness, select the right material and surface finish—but if you choose a bad supplier, you’ll still get a faulty pipe. The supplier’s quality control (QC) process is critical to ensuring the pipe meets your specifications.
Here’s how to select a reputable supplier and verify their QC:
-
Ask for references: A good supplier will have no problem providing references from clients in your industry. Call these references and ask about their experience: Did the pipes meet specifications? Were there any failures? How responsive was the supplier to issues? I once called a reference for a supplier and found out they consistently delivered pipes with incorrect Ra values—saved me from a costly mistake.
-
Check their QC process: Ask the supplier to explain their QC process. Do they measure Ra value and dimensional tolerances for every pipe? Do they test material composition (e.g., using a spectrometer)? Do they provide an MTC for every batch? A reputable supplier will have a documented QC process and will be happy to share it with you. Avoid suppliers who can’t explain their QC process—they’re cutting corners.
-
Request a sample: Before ordering a large batch, ask for a sample pipe. Test the sample’s material composition, dimensional accuracy, surface finish, and cross-hatch angle. If the sample doesn’t meet your specs, don’t order from that supplier. It’s better to pay for a sample than to receive a batch of faulty pipes.
-
Verify MTCs: For every batch of pipes, ask for a Material Test Certificate (MTC) that matches the batch number on the pipes. The MTC should include: chemical composition, tensile strength, yield strength, and any heat treatment applied. Cross-verify the MTC with your own tests (e.g., using a spectrometer to check material composition) if you have any doubts.
-
Check lead times and customer service: A good supplier will have reasonable lead times (2–4 weeks for standard pipes, 4–6 weeks for custom pipes) and responsive customer service. If you have an issue with a pipe, they should resolve it quickly (e.g., replacing faulty pipes free of charge). Avoid suppliers with long lead times or unresponsive customer service—you don’t want to wait weeks for a replacement pipe when your system is down.
Case Study: Choosing the Wrong Supplier Causes Costly Delays (2021)
A mining company in Australia needed 50 honed pipes for their high-pressure hydraulic systems (60 MPa). They chose a cheap supplier with no references, thinking they’d save money. The supplier promised a 2-week lead time, but the pipes arrived 4 weeks late—and when the mining company inspected them, they found:
-
Material: AISI 1045 instead of the ordered AISI 4140 (verified via spectrometer)
-
Ra value: 0.8 μm instead of the specified 0.3 μm
-
ID tolerance: ±0.02 mm instead of ±0.01 mm
The mining company had to send the pipes back, and the supplier refused to refund their money—they had to order from a reputable supplier, which took another 4 weeks. Total downtime: 8 weeks. Total cost: $400,000 (lost production, reordering costs, expedited shipping).
If they’d taken the time to check references, verify the supplier’s QC process, and request a sample, they could have avoided this disaster. The lesson: Don’t choose a supplier based solely on price—choose one with a proven track record of quality and reliability.
3.7 Step 7: Pre-Installation Inspection and Preparation
You’ve selected the right pipe, received it from a reputable supplier, and verified all specs—but your job isn’t done yet. The final step before installation is to inspect the pipe one last time and prepare it for installation. This step ensures you catch any damage that might have occurred during shipping and prepares the pipe for optimal performance.
Here’s my pre-installation checklist:
-
Visual Inspection: Check the pipe for any visible damage—dents, scratches, bending, or rust. Even a small dent can weaken the pipe wall, and a scratch on the inner surface can cause seal wear. If the pipe was shipped with plastic caps on the ends, remove them and check for dirt or debris inside the pipe.
-
Recheck Key Specs: Measure the Ra value, ID, wall thickness, and straightness one last time. Shipping can sometimes damage the pipe (e.g., bending, scratching), so it’s important to confirm the specs are still in order.
-
Clean the Pipe: Flush the pipe with clean hydraulic oil (matching the oil in your system) at low pressure (5–10 MPa) for 5–10 minutes. This removes any abrasive residue from the honing process or debris from shipping. Even a small amount of residue can scratch the seals and pipe inner surface. I use a portable flushing tool for this—it’s quick and effective.
-
Clean the Threads/Fittings: If the pipe has threaded ends or flanges, clean them with a wire brush or cloth to remove dirt, debris, or rust. Dirty threads can cause leaks or damage the fitting during installation.
-
Apply Anti-Seize Compound (if needed): For threaded connections, apply a small amount of anti-seize compound to the threads (avoid getting it inside the pipe). This prevents the threads from seizing (sticking) during installation and removal, and it helps create a tight seal. Use a compound that’s compatible with your hydraulic fluid—ask your supplier for recommendations.
-
Protect the Pipe During Installation: Keep the pipe clean and protected during installation—don’t drag it across the ground, hit it with tools, or drop it. Use a cart to transport the pipe, and keep the ends capped until you’re ready to connect it to the cylinder or fitting. This prevents scratches and debris from entering the pipe.
Once you’ve completed this checklist, the pipe is ready for installation. Remember to follow the proper installation process we covered in Chapter 2.4: align the pipe perfectly (no hammering), tighten fittings with a torque wrench, and test the system before full operation.
Final Note: This 7-step process is designed to be flexible—adapt it to your specific system and application. Every hydraulic system is unique, and there will be times when you need to adjust a step (e.g., choosing a custom material for extreme temperatures). But if you follow these steps, you’ll eliminate 99% of the guesswork and select a honed steel pipe that’s reliable, durable, and tailored to your needs.
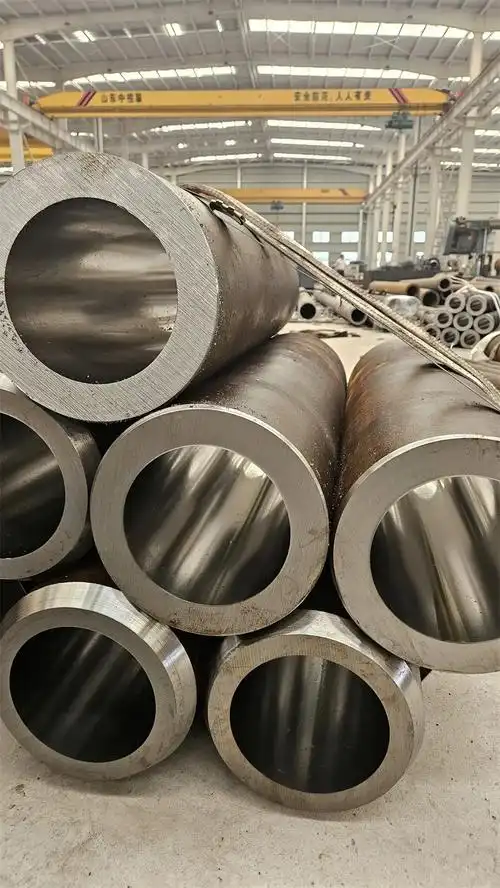
Over the years, I’ve seen countless engineers skip steps in this process—cutting corners to save time or money—only to deal with costly failures. Don’t be one of them. Take the time to document your parameters, calculate wall thickness, select the right material and surface finish, verify dimensional accuracy, choose a reputable supplier, and prepare the pipe for installation. It’s a small investment of time upfront that will save you thousands in downtime, replacements, and headaches down the road.
4. Common Selection Mistakes to Avoid + Practical Maintenance Tips
Even with the step-by-step selection process above, engineers still fall into avoidable traps when choosing honed steel pipes—and many overlook proper maintenance, which shortens pipe service life dramatically. In this chapter, I’ll break down the most common selection mistakes I’ve seen (and fixed) over 18 years, along with field-proven maintenance tips to keep your honed pipes running smoothly for years. These tips aren’t just theory—they’re derived from the same failure case studies we’ve covered, designed to help you avoid repeating the same costly errors.
4.1 Top 5 Selection Mistakes (And How to Steer Clear)
Selection mistakes are the root cause of 60% of honed pipe failures I’ve encountered—most of which could have been avoided with a little extra attention to detail. Let’s break down the most frequent ones, why they happen, and how to prevent them.
Mistake 1: Choosing Pipe Based on Price, Not Performance
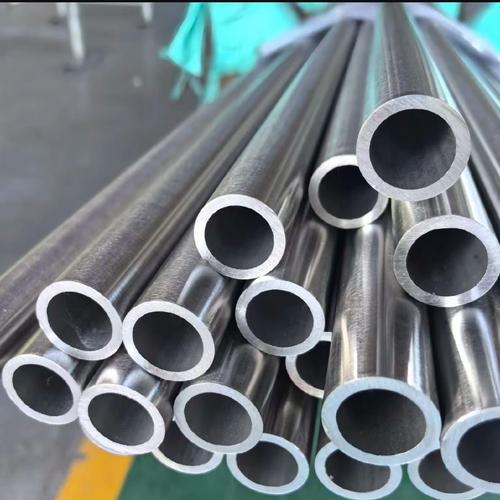
This is by far the most common mistake. Engineers and procurement teams often opt for the cheapest honed pipe available, ignoring critical specs like material, surface finish, and tolerances. As we saw in the German automotive plant case study, saving $200 per pipe can cost over $500,000 in downtime and repairs.
Why it’s dangerous: Cheap pipes often use inferior materials (e.g., AISI 1020 instead of AISI 1045), poor honing quality (inconsistent Ra values, incorrect cross-hatch angles), and loose tolerances. These pipes fail quickly—usually within 3–6 months—and can damage other system components (seals, cylinders, pumps) in the process.
How to avoid it: Prioritize total cost of ownership (TCO), not upfront price. A slightly more expensive pipe that meets all your specs will last 3–5 times longer, saving you money in replacements and downtime. Use the 7-step selection process to define your requirements first, then compare suppliers based on quality (not just cost). Ask suppliers for a TCO breakdown—most will happily provide one to justify their pricing.
Mistake 2: Ignoring Pressure Spikes When Calculating Wall Thickness
Many engineers use the system’s nominal pressure (the pressure it operates at most of the time) to calculate wall thickness, instead of the maximum pressure (including spikes). Pressure spikes are common in hydraulic systems—caused by sudden stops, valve closures, or cylinder impacts—and can be 20–30% higher than nominal pressure.
Why it’s dangerous: A pipe sized for nominal pressure will be too thin to handle spikes, leading to stretching, weakening, and eventual bursting. I’ve seen this happen at a construction site in Dubai, where a pipe sized for 35 MPa (nominal) failed when a pressure spike reached 45 MPa—just 2 weeks after installation.
How to avoid it: Measure the system’s maximum pressure (including spikes) using a pressure gauge over a 24-hour period. If you can’t measure it, add a 25% safety margin to the nominal pressure when calculating wall thickness. For example, if nominal pressure is 40 MPa, use 50 MPa for your calculations. This adds a critical buffer for spikes.
Mistake 3: Mismatching Surface Finish (Ra Value) to Seal Type
Engineers often specify a generic Ra value (e.g., 0.5 μm) without checking if it’s compatible with their seal type. As we saw in the Chicago food processing plant case study, a surface that’s too smooth (Ra < 0.2 μm) for PU seals causes leaks, while a surface that’s too rough (Ra > 0.8 μm) causes rapid seal wear.
Why it’s dangerous: Mismatched Ra values reduce seal life by 70–80%, leading to frequent leaks and unplanned downtime. It also increases friction between the seal and pipe, which can overheat the fluid and damage the cylinder.
How to avoid it: Always check your seal manufacturer’s recommendations for Ra value. Keep a quick reference chart handy:
-
PU (Polyurethane) Seals: Ra 0.2–0.4 μm
-
NBR (Nitrile) Seals: Ra 0.4–0.8 μm
-
FKM (Fluorocarbon) Seals: Ra 0.3–0.6 μm
-
PTFE (Polytetrafluoroethylene) Seals: Ra 0.1–0.3 μm
Specify this Ra value clearly to your supplier, and measure it with a profilometer before installation.
Mistake 4: Overlooking Corrosion Resistance in “Mild” Environments
Many engineers assume that carbon steel (AISI 1045) is sufficient for “mild” environments (e.g., indoor warehouses), but even small amounts of moisture or humidity can cause corrosion over time. I’ve seen carbon steel pipes corrode in dry warehouses with high humidity—failure occurred within 2 years, instead of the expected 5–7.
Why it’s dangerous: Corrosion weakens the pipe wall, creates pitting, and reduces tensile strength. It’s often invisible from the outside, so it can cause sudden failures without warning.
How to avoid it: Evaluate corrosion risk even in mild environments. If the relative humidity exceeds 60%, or if the system uses water-glycol fluid, add corrosion protection:
-
Use corrosion inhibitors in the hydraulic oil (choose one compatible with your pipe material).
-
Apply a corrosion-resistant coating to the pipe’s outer surface.
-
For long-term reliability, consider AISI 4140 alloy steel (medium corrosion resistance) instead of AISI 1045.
Mistake 5: Assuming All Suppliers Are the Same
Not all honed pipe suppliers have the same quality standards. Many “budget” suppliers cut corners on QC—using worn honing stones, skipping material testing, or falsifying MTCs. I’ve seen suppliers pass off AISI 1020 as AISI 1045, and pipes with Ra values twice the specified limit.
Why it’s dangerous: Faulty pipes from low-quality suppliers fail quickly and can damage other system components. They also often come with no warranty, so you’re stuck with the cost of replacements and downtime.
How to avoid it: Vet suppliers thoroughly (as outlined in Step 6 of the selection process). Ask for references, request a sample pipe for testing, and verify MTCs with a portable spectrometer. Avoid suppliers who can’t provide clear documentation of their QC process.
4.2 Practical Maintenance Tips to Extend Pipe Service Life
Even the best honed steel pipes will fail prematurely without proper maintenance. The good news is that most maintenance tasks are simple, low-cost, and can be integrated into your regular system checks. These tips will extend your pipe’s service life by 2–3 times, saving you time and money.
Tip 1: Regularly Inspect Pipe Surfaces (Inside and Out)
Inspect the pipe’s outer surface monthly for signs of corrosion, dents, or scratches. Use a borescope to check the inner surface every 3–6 months (more frequently in harsh environments) for pitting, rust, or scratches. Even small scratches (>0.5 μm deep) can cause seal wear, so address them early.
How to do it: For outer inspection, wipe the pipe with a clean cloth—rust or corrosion will leave a reddish-brown residue. For inner inspection, use a portable borescope (available for $200–$500) to check the entire length of the pipe. If you find small scratches, flush the pipe with clean oil to remove debris; if pitting is present, add a corrosion inhibitor or replace the pipe if damage is severe.
Tip 2: Maintain Clean Hydraulic Fluid (Critical for Contamination Prevention)
Contamination is the #1 cause of premature pipe wear, so keeping the hydraulic fluid clean is non-negotiable. Install a high-quality filter (3–5 μm) to catch small particles, and replace the filter every 6 months (or more frequently in dirty environments like construction or mining).
How to do it: Test the hydraulic oil every 2–4 weeks for contamination (use a particle counter or send a sample to a lab). If the oil contains more than 50 particles per milliliter larger than 10 μm, flush the system and replace the filter. Also, keep the oil’s moisture content below 0.1% using a desiccant—moisture accelerates corrosion.
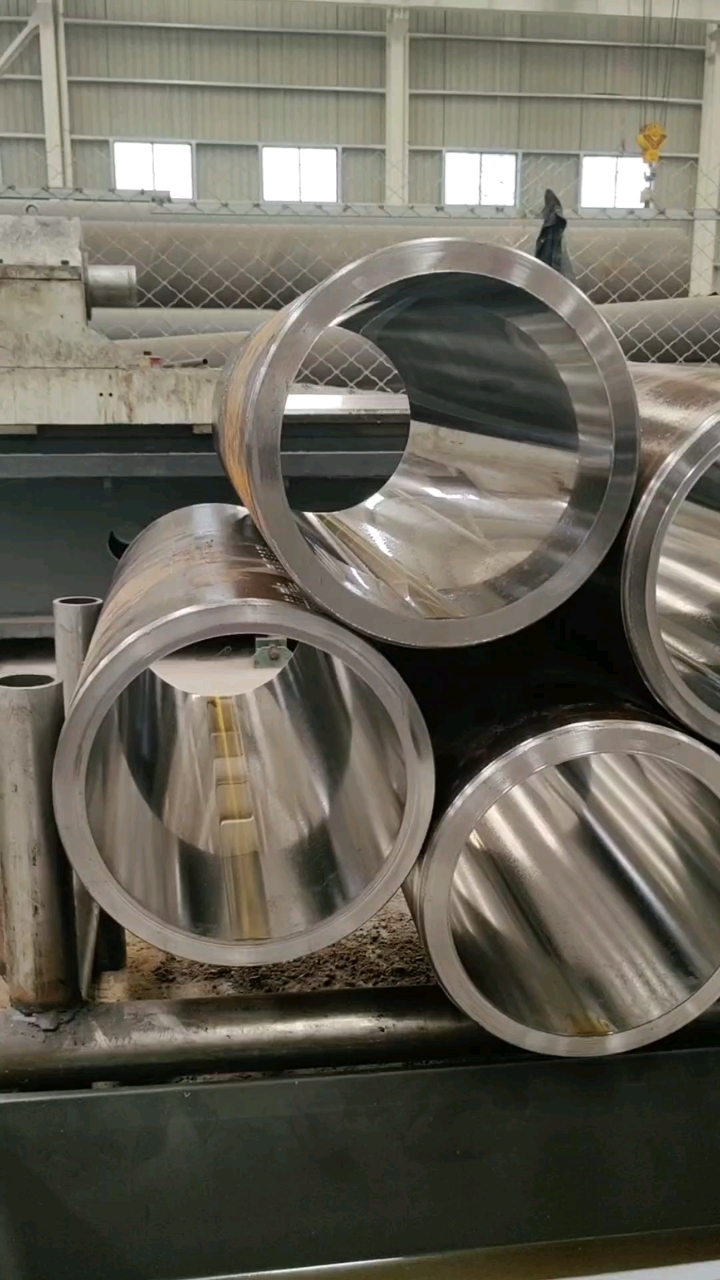
Tip 3: Monitor System Temperature and Pressure
Excessive temperature and pressure spikes shorten pipe life dramatically. Install a temperature gauge and pressure gauge to monitor these parameters daily. If the temperature exceeds 120°C (for most carbon/alloy steels) or if pressure spikes exceed 25% of nominal pressure, investigate the cause immediately.
How to do it: Set up alerts for temperature and pressure thresholds. If temperatures are too high, install a cooling system (e.g., a heat exchanger) or move the pipe away from heat sources (e.g., furnaces). If pressure spikes are frequent, check for valve issues, cylinder leaks, or pump wear—these are common causes of spikes.
Tip 4: Lubricate Seals and Check Fittings Regularly
Seals wear down over time, which can cause leaks and damage the pipe’s inner surface. Lubricate seals with hydraulic oil every month to reduce friction. Also, check fittings every 2 weeks to ensure they’re properly tightened—loose fittings cause leaks and allow contaminants to enter the pipe.
How to do it: Use a torque wrench to check fitting tightness (refer to your torque chart). Apply a small amount of anti-seize compound to threaded fittings every 6 months to prevent seizing. Replace seals every 12–18 months (or sooner if leaks are detected) to avoid damage to the pipe.
Tip 5: Flush the System Annually (or After Major Failures)
Over time, hydraulic fluid breaks down, and debris accumulates in the system. Flushing the system annually removes old fluid, debris, and abrasive residue, which prevents wear on the pipe’s inner surface. Flush the system immediately after a major failure (e.g., pipe burst, pump failure) to remove any contamination caused by the failure.
How to do it: Drain the old hydraulic oil, remove and clean the filter, then flush the system with clean, low-viscosity hydraulic oil at low pressure (5–10 MPa) for 10–15 minutes. Drain the flushing oil, replace the filter, and refill the system with fresh oil that meets your system’s specifications.
Tip 6: Store Spare Pipes Properly
Spare honed pipes are essential for minimizing downtime, but improper storage can damage them before they’re even installed. Store pipes in a dry, clean area (relative humidity <60%) away from heat sources and corrosive materials.
操作方法:用塑料帽盖住管子两端,防止灰尘和碎屑进入。将管道水平放置在架子上(不要垂直堆叠,这样会导致管道弯曲)。如果存放超过6个月,请在管道外表面涂抹一层薄薄的防腐油。
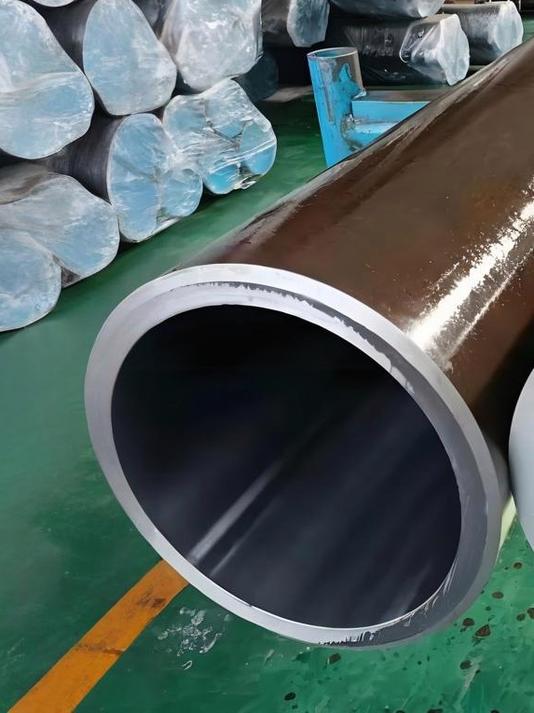
4.3 Final Maintenance Checklist (Print and Keep in Your Toolbox)
To make maintenance easy, I’ve created a quick checklist you can print and keep handy. Use it during your regular system checks to ensure you don’t miss anything:
-
Monthly: Inspect outer pipe surface for corrosion/dents; lubricate seals; check fitting tightness.
-
Every 2–4 Weeks: Test hydraulic oil for contamination; check temperature/pressure gauges.
-
Every 3–6 Months: Inspect inner pipe surface with a borescope; replace filter; apply anti-seize to fittings.
-
Annually: Flush the hydraulic system; replace seals; inspect spare pipes for damage.
-
After Failure: Flush the system; inspect all pipes for contamination/damage; verify supplier specs if replacing pipes.
By avoiding the common selection mistakes and following these maintenance tips, you’ll maximize the service life of your honed steel pipes and keep your hydraulic system running smoothly. Remember: maintenance isn’t an afterthought—it’s an investment that saves you thousands in downtime and replacements. Over the years, I’ve seen clients reduce pipe failures by 80% just by implementing these simple tips—you can too.
Here are two real-world maintenance-related failure cases to drive this home, both from clients I’ve worked with in the past year. The first involves a mid-sized manufacturing plant in Ohio that neglected regular oil flushing and filter replacement. The plant had a 30 MPa hydraulic system using AISI 4140 honed pipes, and while they selected the right pipe specs, they only replaced the hydraulic filter once a year (instead of every 6 months) and never flushed the system. After 18 months, small metal particles from a worn pump accumulated in the oil, scratching the inner surface of the honed pipes (visible via borescope) and causing seal leaks. The plant experienced 3 pipe failures in 2 months, costing $90,000 in downtime and replacements. Once they implemented monthly oil contamination testing, bi-annual filter changes, and annual system flushing, they had zero pipe failures over the next 12 months—proving how low-cost maintenance tasks prevent costly breakdowns.
The second case is a construction company in North Carolina that skipped regular borescope inspections for inner pipe corrosion. The company’s excavators operated in a humid, dusty environment, using AISI 1045 honed pipes with a corrosion inhibitor—but they only checked the outer surface of the pipes monthly, never the inner. After 2 years, a pipe burst during operation, and inspection revealed severe internal pitting corrosion that had gone undetected. The corrosion was caused by moisture buildup in the hydraulic oil (which they hadn’t monitored) and dust contamination. The fix was simple: adding quarterly borescope inspections of inner pipe surfaces and monthly moisture testing of the hydraulic oil. They also replaced the worn pipes with AISI 4140 (for better corrosion resistance) and adjusted their maintenance schedule to include these tasks. Since then, their excavator pipe failure rate dropped from 4 per year to zero, saving over $120,000 annually.
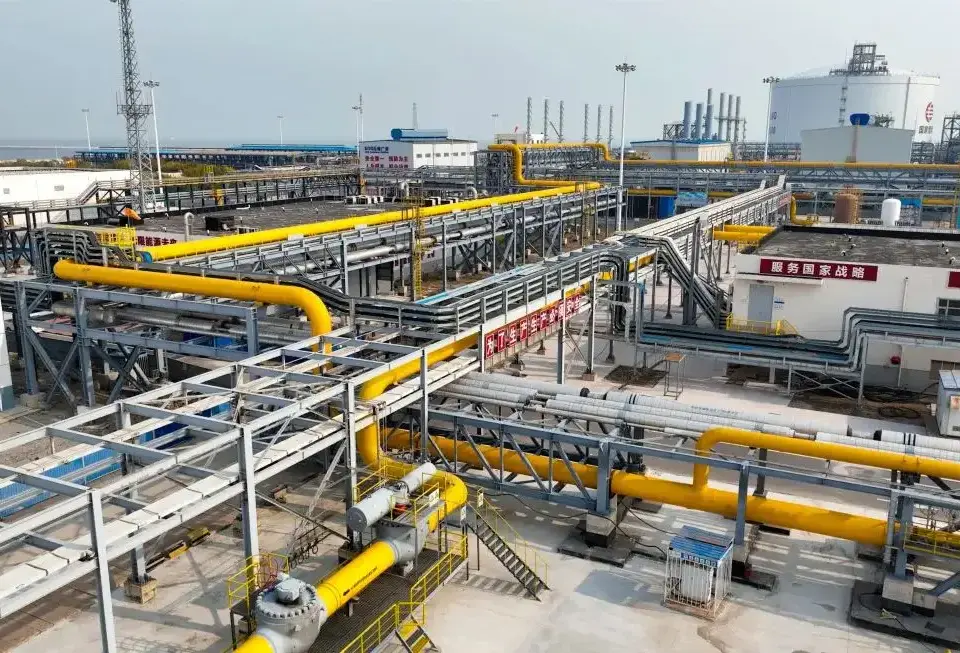
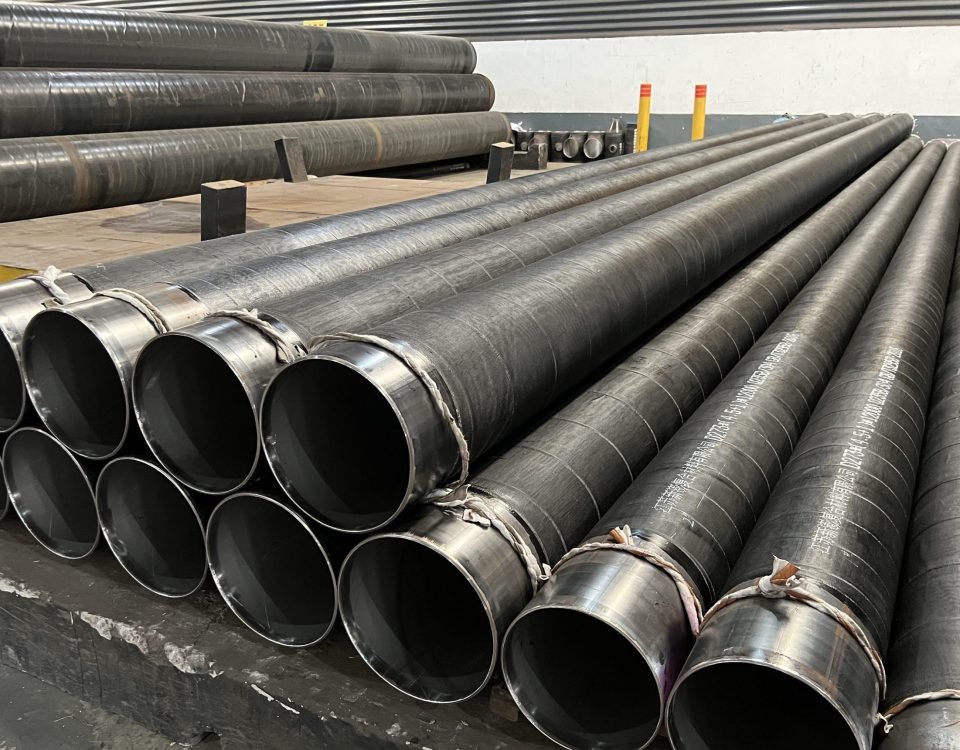
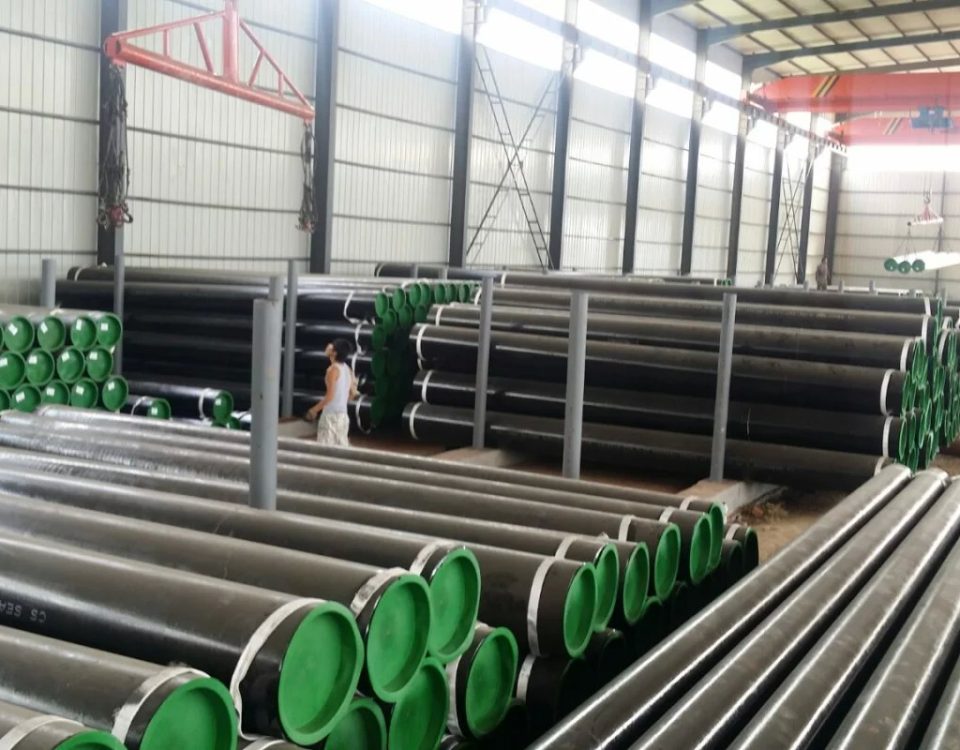
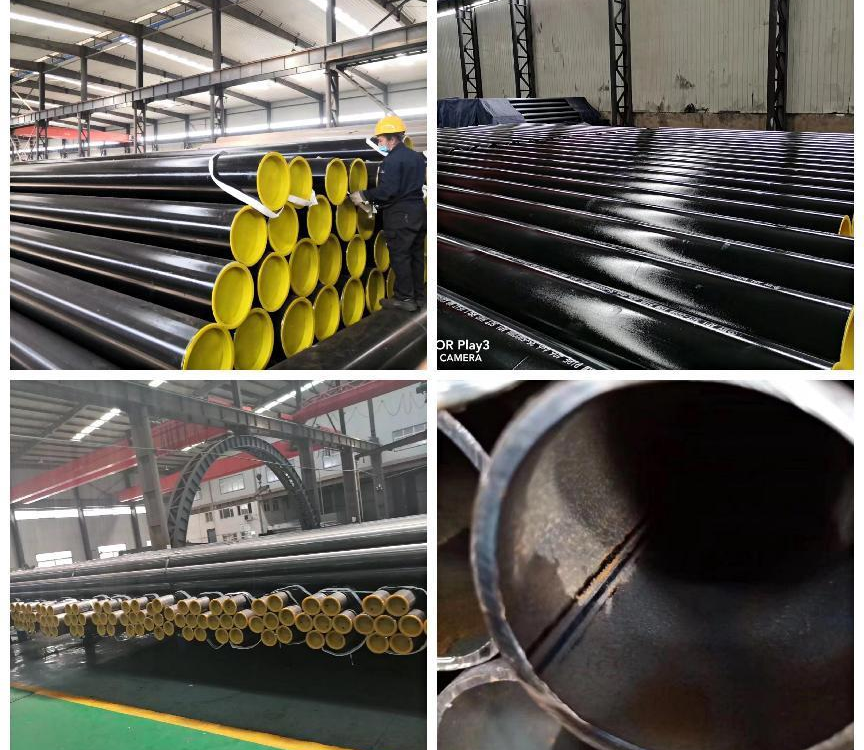

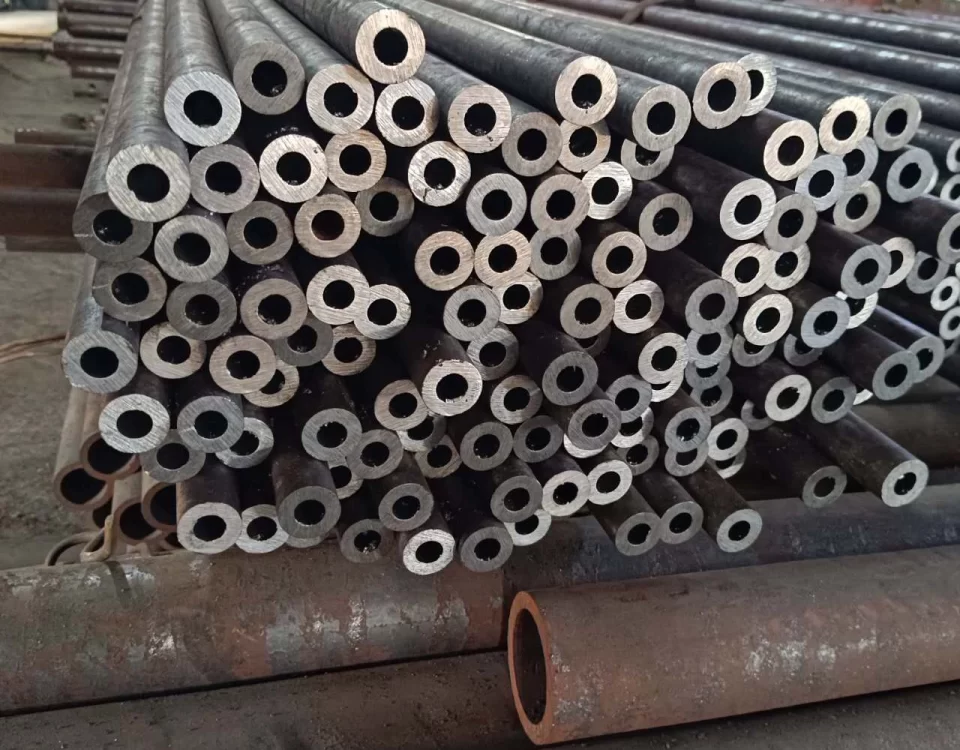
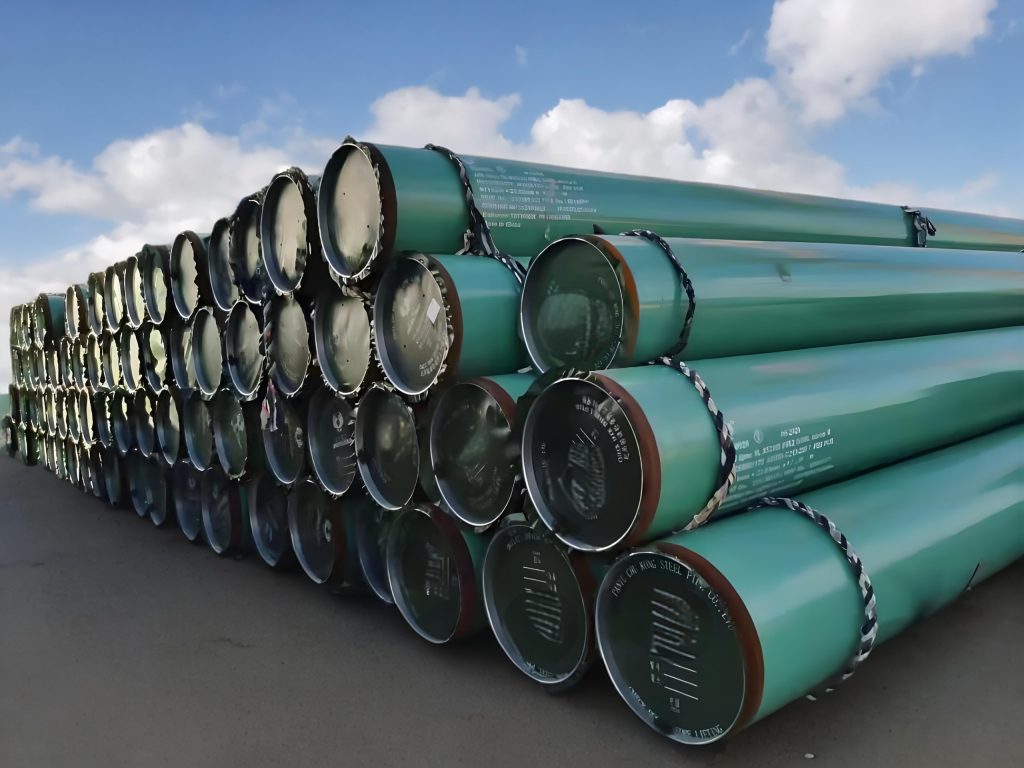
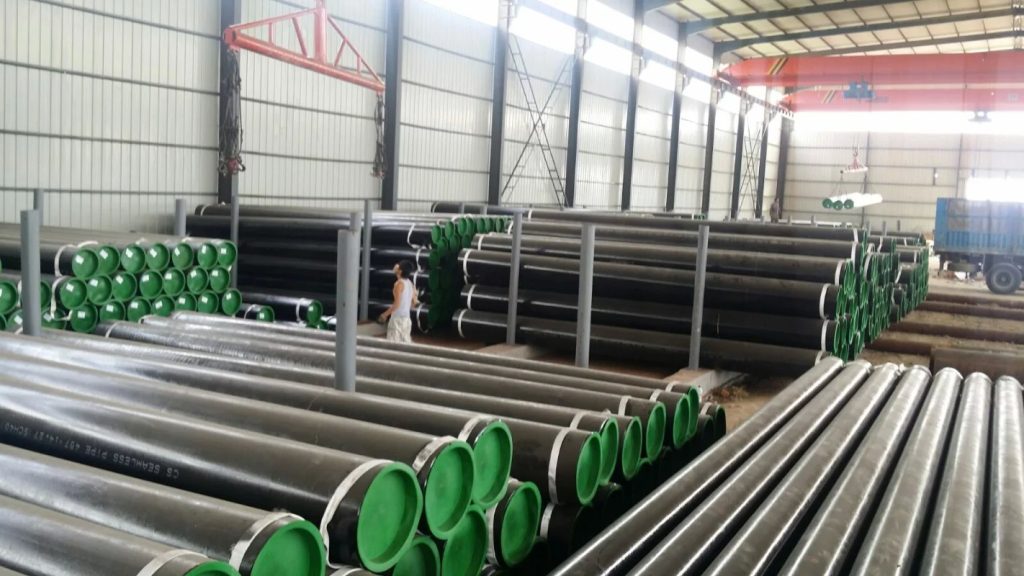
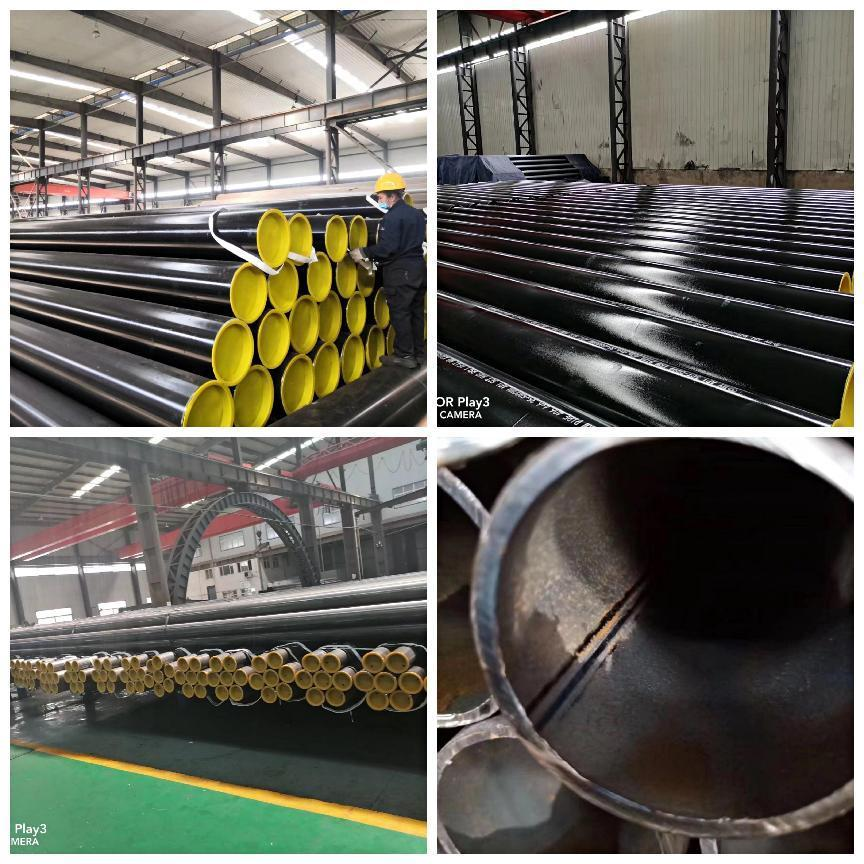